You can give your crochet tote bag designs a high-end aesthetic with firm fabric, balanced shapes, and carefully finished straps. You get the cozy appeal of handmade texture in a useful accessory, with plenty of room to make the colors your own.
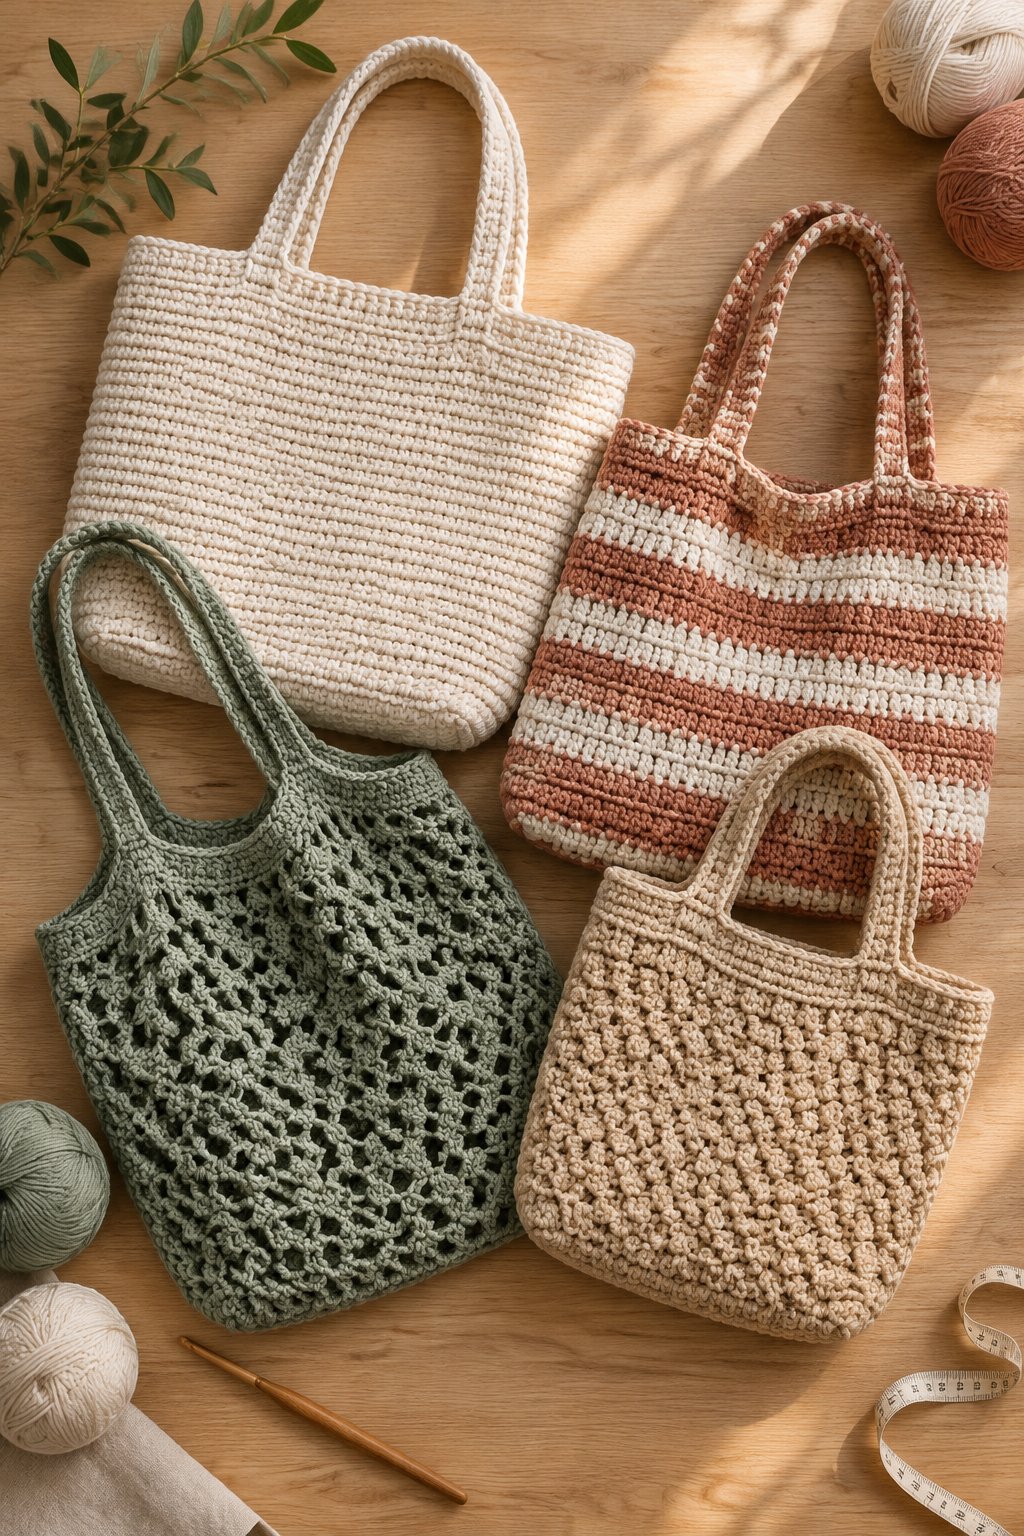
Save the designs that fit your wardrobe and your crochet comfort level. Use these ideas as project directions, then choose a matching pattern for exact stitch counts. Your hook size will need a swatch check, and the time ranges below are planning estimates that vary with your pace and bag size.
1) Structured Raffia Tote With a Flat Rectangular Base
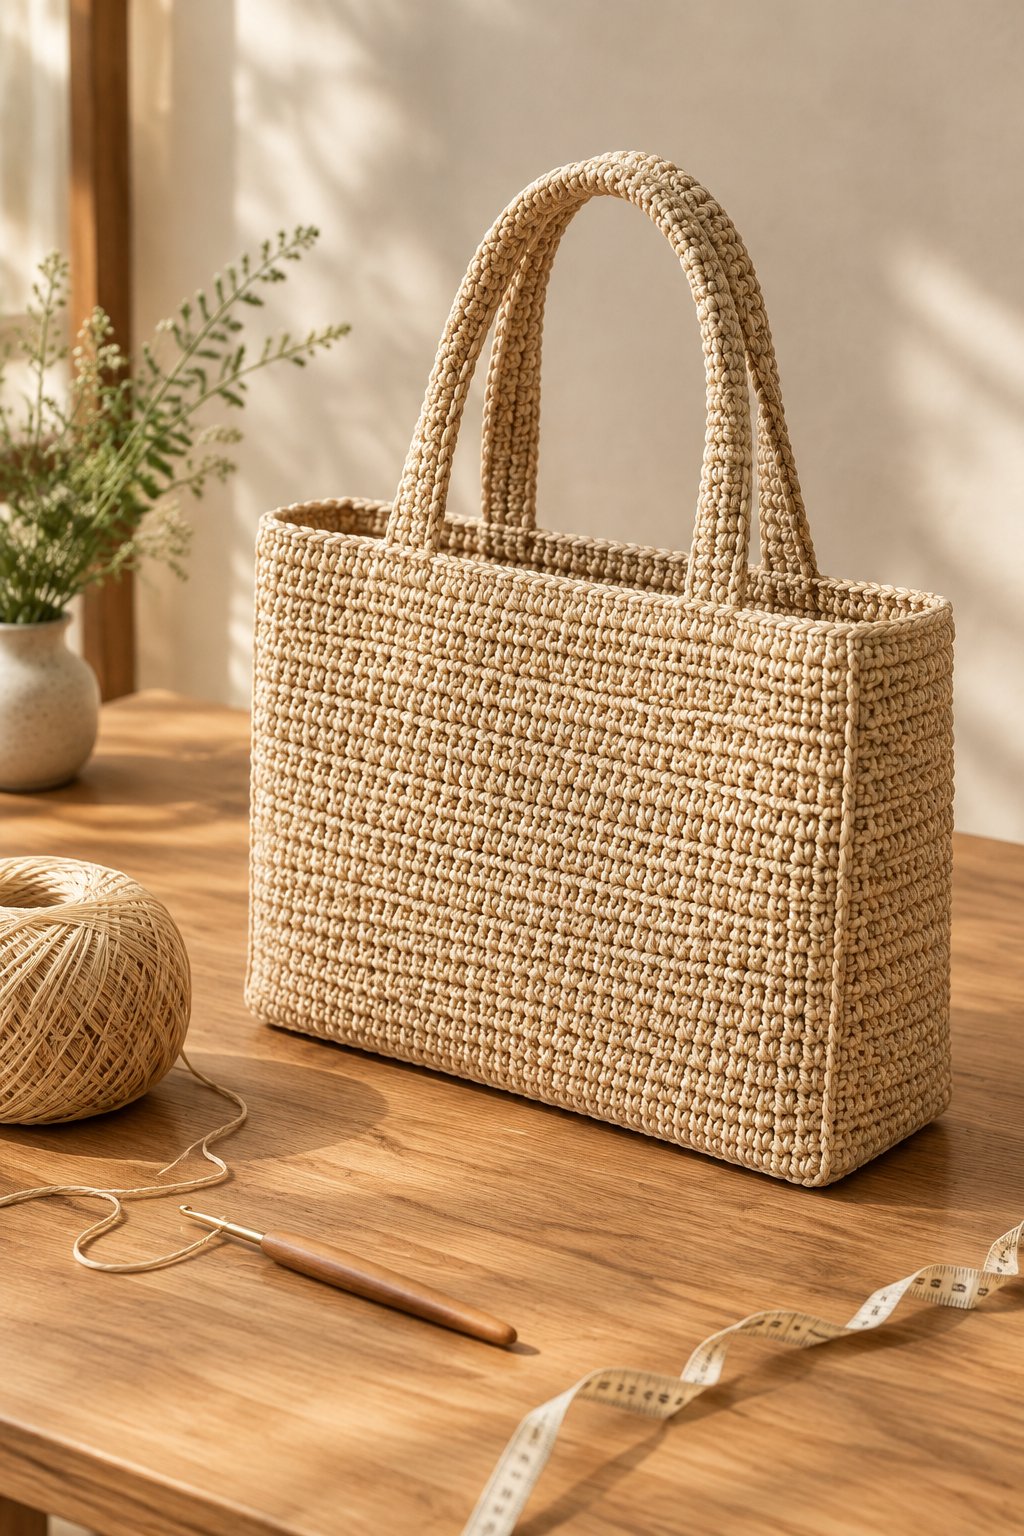
Give your summer wardrobe a tailored touch with a sand-colored raffia tote built around a crisp rectangular base. Your finished shape feels especially polished with straight sides and a narrow top border.
Choose crochet raffia labeled near worsted weight, then swatch with a 4–5 mm hook. Work dense single crochet for the base and walls, following your pattern’s corner increases. Check the rectangle against a flat surface before building upward; uneven increases leave you with a rippled foundation.
Plan this as an intermediate project because firm raffia takes practice to tension comfortably. Keep your handles short for a compact shopping tote, or allow extra shoulder clearance for summer layers. Pair your finished bag with linen pants and leather sandals. For paper-based raffia, follow the label’s care directions and protect your tote from soaking.
|
Detail |
Specification |
|---|---|
|
Yarn Weight |
Worsted-equivalent raffia |
|
Skill Level |
Intermediate |
|
Estimated Time |
10–16 hours |
2) Monochrome Granny-Square Tote With Wide Shoulder Straps

Your granny-square tote gains a refined look when you use one color throughout and repeat the same square size. Choose charcoal for a graphic finish or warm ivory for a softer, vintage-inspired accessory.
Use worsted-weight cotton with a 4–5 mm hook, adjusting until your squares feel firm. Traditional double-crochet clusters give you familiar texture, while a matching flat seam keeps the joins subtle. Block every square to the same measurements before assembly, and check that your corner spaces line up.
Choose this easy project if you already know granny squares and want practice joining motifs. Make the shoulder straps about 1½–2 inches wide for comfortable contact with your shoulder. You can coordinate the monochrome finish with printed clothing or gift the tote in someone’s favorite neutral. Keep your joining yarn consistent for an even outline.
|
Detail |
Specification |
|---|---|
|
Yarn Weight |
Worsted cotton |
|
Skill Level |
Easy |
|
Estimated Time |
8–14 hours |
3) Camel Herringbone Half-Double-Crochet Tote

Choose camel herringbone half-double crochet when you want your tote to have a subtle woven appearance. A simple rectangular shape lets you show off the slanted stitches without competing decorative details.
Start with smooth worsted-weight cotton and a 4.5–5 mm hook. For the herringbone stitch, yarn over, insert your hook, and draw a loop through both the fabric and the first loop on your hook. Yarn over again and pull through the remaining two loops. Practice on a swatch before starting your bag.
You’ll find this an approachable intermediate project, especially when you mark each row’s first and last stitch. Keep your edges straight by counting regularly. Style your warm camel tote with denim or an oatmeal sweater. Add a small matching pocket inside if you want a dedicated place for your phone.
|
Detail |
Specification |
|---|---|
|
Yarn Weight |
Worsted cotton |
|
Skill Level |
Intermediate |
|
Estimated Time |
10–16 hours |
4) Chocolate-and-Cream Tapestry Checkerboard Tote

Bring a graphic touch to your everyday outfits with a chocolate-and-cream checkerboard tote. Your squares look especially crisp when you repeat the same proportions across a straight-sided body.
Select two shades of the same worsted-weight cotton and start with a 4–4.5 mm hook. Use tapestry single crochet, enclosing the unused strand as you work. Complete each color change on the final pull-through of the previous stitch, then keep the carried yarn relaxed enough to preserve the fabric’s width.
Set aside intermediate-level attention for your chart and yarn tension. Swatch a full checker repeat because stitch height affects whether your blocks look square. Pair your tote with a cream shirt or dark denim. For a quieter variation, use chocolate and taupe while keeping the same layout and a solid chocolate upper border.
|
Detail |
Specification |
|---|---|
|
Yarn Weight |
Worsted cotton |
|
Skill Level |
Intermediate |
|
Estimated Time |
12–18 hours |
5) Chunky Ribbed Tote With Integrated Handles

You get a sculpted, modern accessory with chunky ribbing and handles worked into the upper edge. Choose stone gray or mushroom beige to give your rounded tote a clean, understated finish.
Try bulky cotton cord with a 6–8 mm hook, checking that you can pull stitches through comfortably. Back-loop single crochet creates pronounced ribs. Follow a pattern that accounts for the ribs’ direction, since sideways panel construction changes how you shape the handle openings.
You’ll want intermediate skills for the shaping, even though the main stitch is straightforward. Keep the bag fairly compact because thick cord adds weight before you fill it. Make both handle openings equal by counting skipped stitches and chains carefully. Carry your finished tote by hand with a simple dress, or make a small version as a thoughtful handmade gift.
|
Detail |
Specification |
|---|---|
|
Yarn Weight |
Bulky cotton cord |
|
Skill Level |
Intermediate |
|
Estimated Time |
6–10 hours |
6) Navy-and-Ecru Moss-Stitch Striped Tote

Give your tote a coastal feel with navy-and-ecru stripes worked in compact moss stitch. You’ll get a lightly textured surface that suits a simple rectangular body and solid navy straps.
Choose worsted-weight cotton and test a 4–5 mm hook. Alternate single crochet and chain-one spaces, placing the next row’s single crochet into each chain space. Change colors at the edge, and weave your ends into matching stripes to keep the light areas clean.
This easy project suits you if you’re comfortable keeping a steady stitch count. Decide your stripe sequence before starting, then record the row counts so both panels match. Use narrow stripes for a delicate finish or broad bands for stronger contrast. Your finished tote pairs easily with white sneakers and denim. Measure strap length while wearing the layers you expect to carry it over.
|
Detail |
Specification |
|---|---|
|
Yarn Weight |
Worsted cotton |
|
Skill Level |
Easy |
|
Estimated Time |
8–14 hours |
7) Half-Moon Crochet Tote With Bamboo Handles

Shape your tote into a half-moon and add bamboo handles for a warm, sculptural finish. Cream yarn highlights the curve, while caramel or olive gives you a richer option for year-round outfits.
Use worsted-weight cotton with a 4–4.5 mm hook for dense single-crochet panels. Follow a semicircle pattern with measured increases, then connect matching panels with a narrow gusset. Lay each piece flat as you work to catch cupping or rippling early.
Treat this as an intermediate project because your curved seams and handle placement need careful alignment. Check the handles’ attachment style before choosing your pattern; closed rings and slotted handles require different construction. Center both handles, and leave enough finger clearance above the fabric. Carry your finished bag to lunch or a casual event, with smaller essentials gathered in an interior pouch.
|
Detail |
Specification |
|---|---|
|
Yarn Weight |
Worsted cotton |
|
Skill Level |
Intermediate |
|
Estimated Time |
10–16 hours |
8) Sage Basketweave Tote With Reinforced Straps
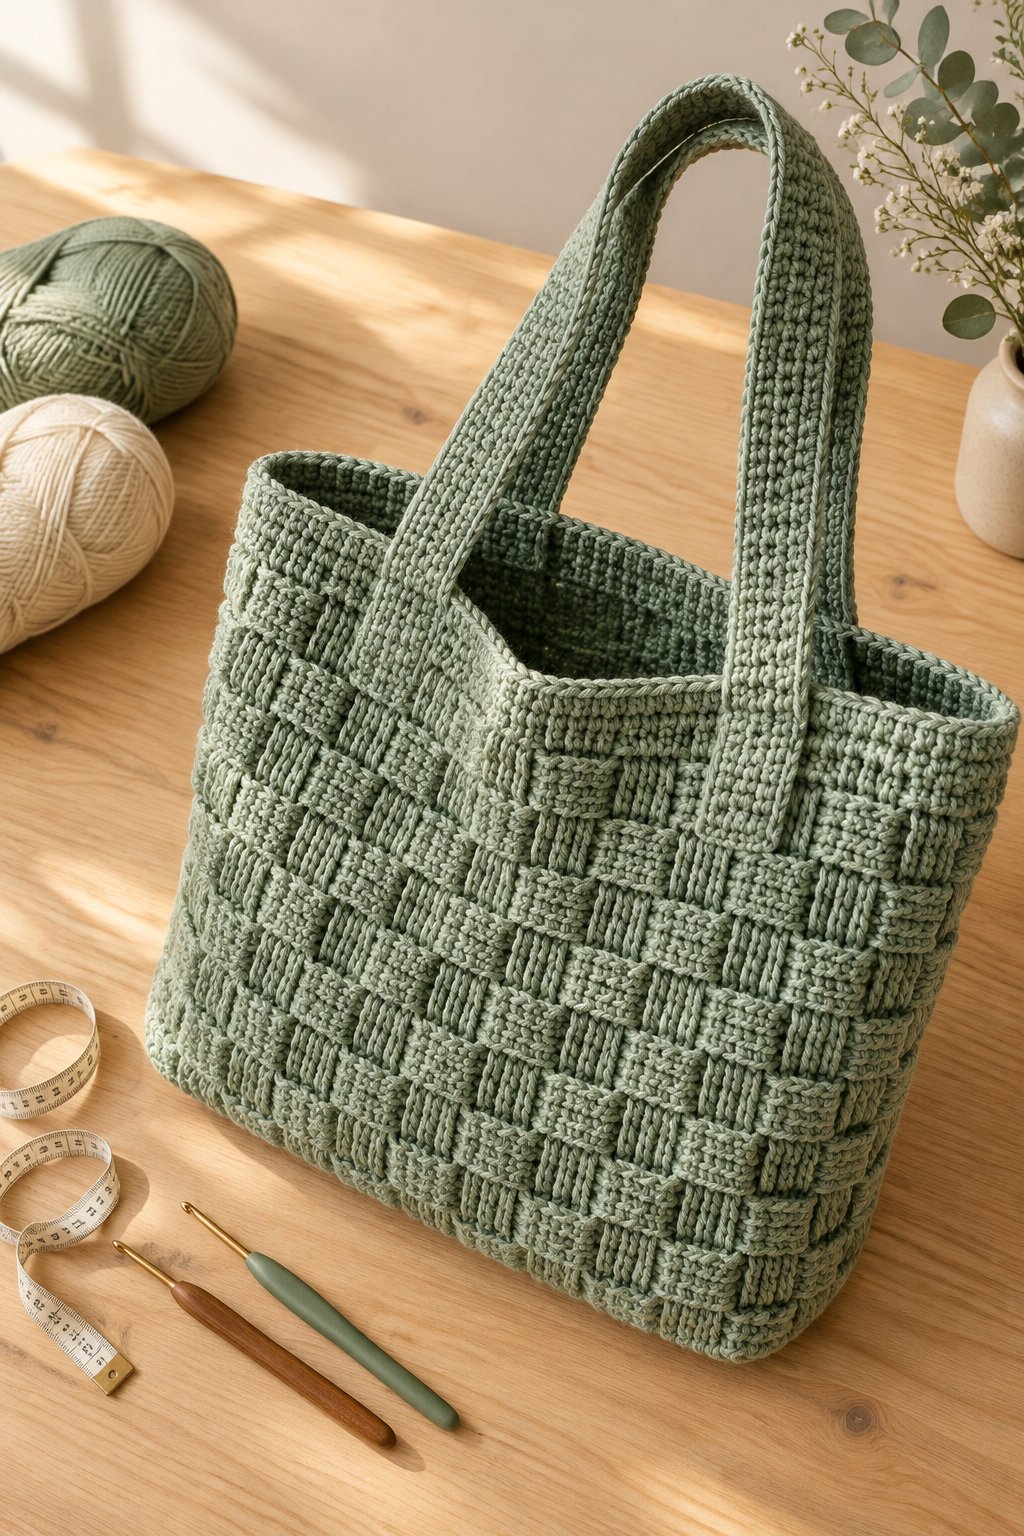
Your sage basketweave tote gets its appeal from raised texture and a softly structured shape. Keep the body slightly wider than it is tall for a practical everyday silhouette.
Choose a smooth worsted-weight cotton blend and begin with a 4.5–5.5 mm hook. Alternate groups of front-post and back-post double crochet according to your pattern. Make a generous swatch because post stitches create thick fabric and use substantial yarn.
Plan for intermediate work, particularly when keeping your woven blocks aligned at the sides. Choose a reinforced-strap construction if you expect to carry a planner or water bottle. Keep your strap placement symmetrical by measuring from each side seam before attachment. Sage pairs well with cream clothing and warm brown accessories. For a coordinated gift, use leftover yarn to make a small textured pouch with a simple button closure.
|
Detail |
Specification |
|---|---|
|
Yarn Weight |
Worsted cotton blend |
|
Skill Level |
Intermediate |
|
Estimated Time |
12–20 hours |
9) Terracotta Color-Block Tote With a Boxed Bottom
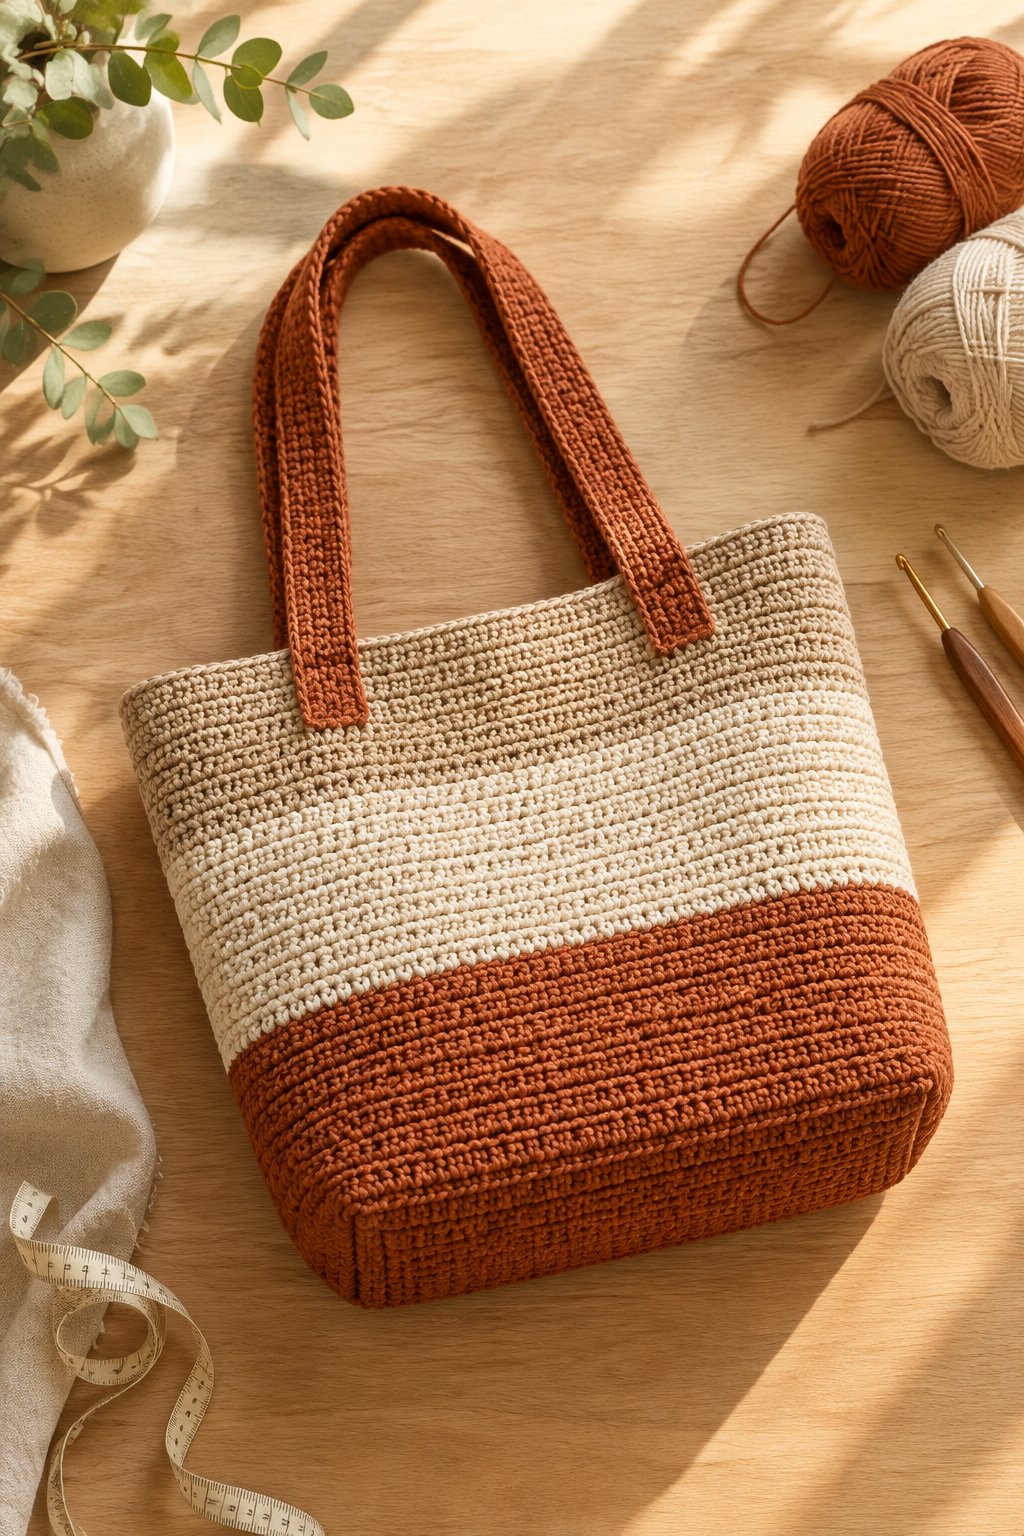
Choose a terracotta-and-cream color block when you want your tote to feel warm and graphic. A boxed bottom adds depth, giving you a useful shape for folded layers or a small lunch container.
Work with worsted-weight cotton and a 4–5 mm hook. Single crochet keeps your color boundary clear and your fabric compact. For a sewn-panel construction, follow your pattern’s instructions for flattening each lower corner and seaming across it to create the base depth.
You’ll find this an easy project if you’re comfortable with basic seams. Match both boxed corners carefully so your bag sits evenly. Place the darker shade at the bottom for a grounded look, and begin your cream block at the same row on both panels. Style your finished tote with a white tee and relaxed jeans for everyday errands.
|
Detail |
Specification |
|---|---|
|
Yarn Weight |
Worsted cotton |
|
Skill Level |
Easy |
|
Estimated Time |
8–12 hours |
10) Ivory Bobble-Diamond Tote With a Smooth Border
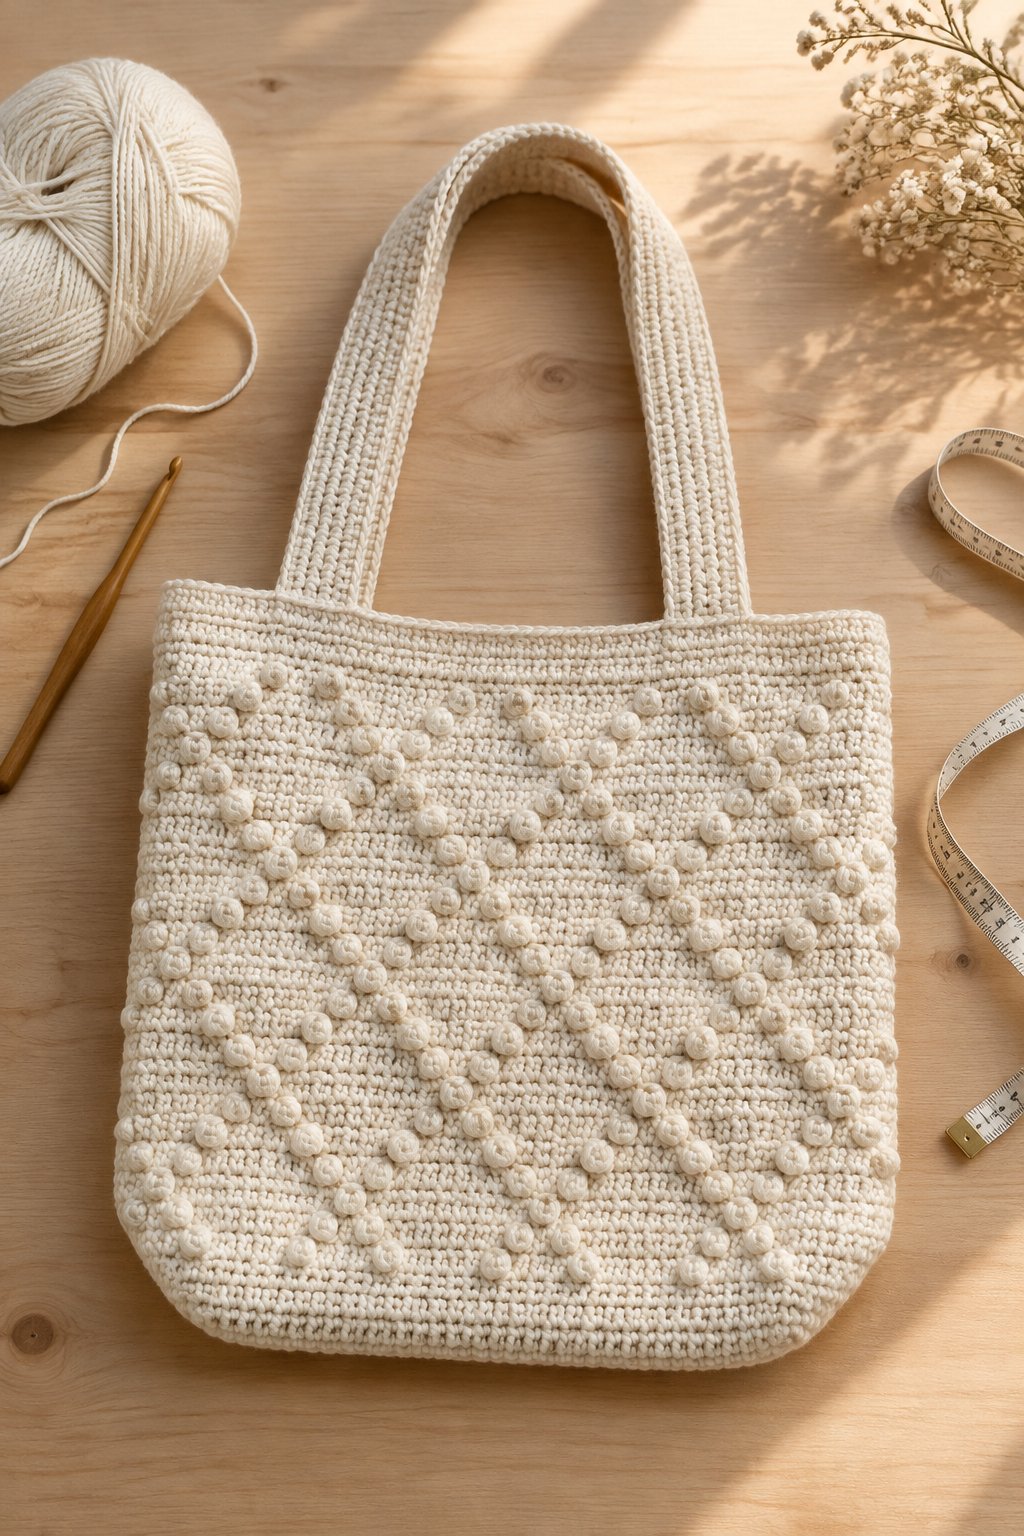
Add a dressier texture to your handmade wardrobe with ivory bobbles arranged in repeating diamonds. You’ll get the clearest effect when you frame the raised pattern with smooth side margins and a plain upper border.
Choose tightly plied worsted-weight cotton and start with a 4–5 mm hook. Use single crochet between bobbles to give each raised stitch space. Follow your chart closely, and check that every bobble pops toward the outside before moving to the next repeat.
Set this intermediate project aside for sessions when you can count without rushing. Keep the back panel plain if you want a smoother surface against your clothing. Your ivory tote suits brunch outfits or a handmade bridal shower gift. Before assembly, compare the panels’ measurements, since the bobble fabric and plain fabric may need different stitch counts.
|
Detail |
Specification |
|---|---|
|
Yarn Weight |
Worsted cotton |
|
Skill Level |
Intermediate |
|
Estimated Time |
12–18 hours |
11) Muted Chevron Tote With a Straight Top Edge

Give your chevron tote a polished finish by balancing soft zigzags with a level upper edge. Choose dusty rose and taupe, then add a narrow cream stripe if you want extra definition.
Use DK cotton with a 3.5–4 mm hook for smaller, closely spaced stitches. Follow a chevron pattern with planned increases and decreases, plus specific leveling rows at the top. A standard border follows the peaks and valleys, so choose instructions that explain how to fill them.
Expect intermediate work as you track repeat placement and edge shaping. Mark every peak during your first few rows to make counting easier. Keep your straps solid-colored so the chevrons remain the focus. You can style the finished tote with a plain knit dress or gift it in colors pulled from the recipient’s favorite scarf.
|
Detail |
Specification |
|---|---|
|
Yarn Weight |
DK cotton |
|
Skill Level |
Intermediate |
|
Estimated Time |
12–18 hours |
12) Circular Medallion Tote With Solid Side Gussets
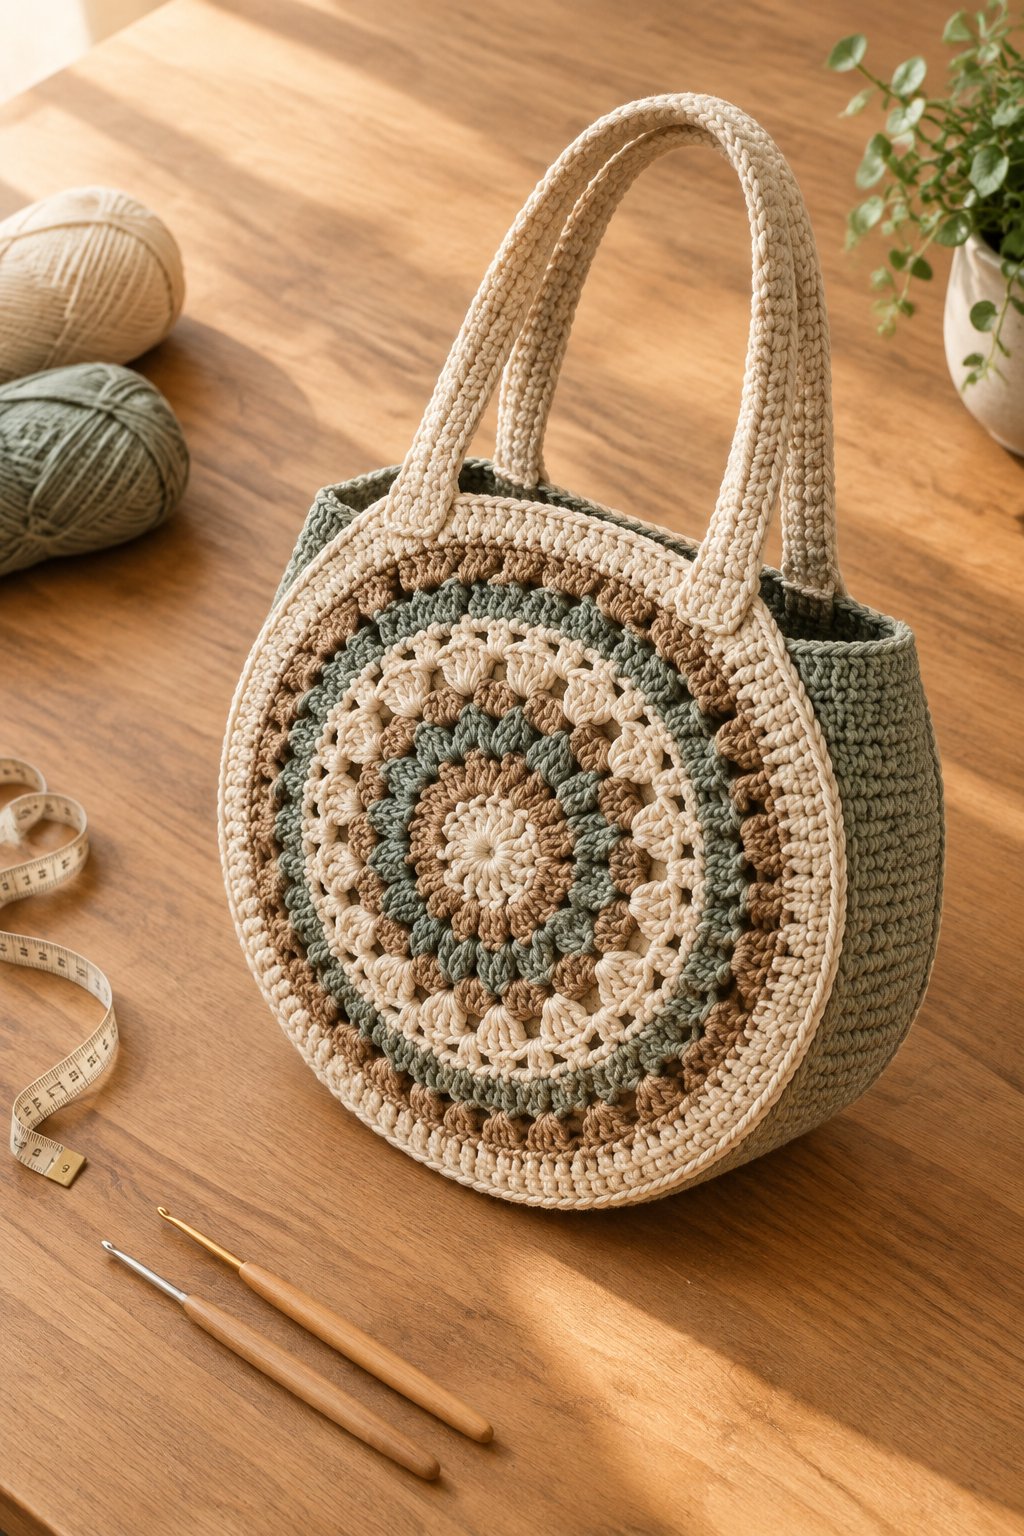
Turn two circular medallions into a distinctive tote by joining them with a solid gusset. You’ll get decorative front and back panels with enough depth to carry your everyday essentials.
Select worsted-weight cotton and try a 4–5 mm hook. Use a medallion pattern that combines solid rounds with controlled openwork, then work the gusset in single crochet. Measure both circles after blocking so you join pieces with matching circumferences.
This intermediate design calls for careful shaping and steady seam placement. Mark the upper opening on both circles before attaching the gusset, keeping those points level. A warm flax shade gives your finished bag a relaxed feel, while dark olive emphasizes the round outline. Attach your straps at reinforced upper sections of the panels, and use an interior pouch to keep small belongings away from open stitches.
|
Detail |
Specification |
|---|---|
|
Yarn Weight |
Worsted cotton |
|
Skill Level |
Intermediate |
|
Estimated Time |
10–18 hours |
13) Cotton Filet Daisy Tote With a Matching Fabric Lining

Let your daisy motif stand out through a filet grid backed with coordinating fabric. Choose pale yellow cotton over a cream lining for soft contrast, or match both layers for a quieter floral effect.
Work with DK cotton and a 3.5–4 mm hook. Follow a filet chart that uses double crochet and chain spaces to form filled and open blocks. Check the chart’s stitch key before beginning, since filet patterns use different block conventions.
You’ll need intermediate confidence for chart reading and fitting the lining. Block your crochet panels before measuring the fabric, and allow seam allowance when cutting. Choose a closely woven lining that keeps small objects contained behind the openwork. Your finished tote makes a sweet spring accessory or garden-lover’s gift. Keep the handles plain to give the daisy pattern a clear focal point.
|
Detail |
Specification |
|---|---|
|
Yarn Weight |
DK cotton |
|
Skill Level |
Intermediate |
|
Estimated Time |
12–20 hours |
14) Scalloped Shell-Stitch Market Tote With a Dense Base

Build your shell-stitch market tote on a dense base to combine decorative texture with practical support. You’ll get a soft, rounded silhouette and a scalloped upper edge that looks lovely in butter yellow or natural cotton.
Choose worsted-weight cotton with a 4–5 mm hook. Begin with a solid oval or rectangular base, then follow your pattern’s transition into shell repeats. Count that transition carefully so the shells fit evenly around the body.
This easy project suits you once you’re comfortable with double crochet and working in rounds. Keep handle attachment areas dense, and place both straps symmetrically between scallops. Use your tote for light shopping or a folded beach towel. If you plan to carry small produce, tuck a washable fabric bag inside to contain loose items and simplify cleanup after each outing.
|
Detail |
Specification |
|---|---|
|
Yarn Weight |
Worsted cotton |
|
Skill Level |
Easy |
|
Estimated Time |
8–14 hours |
How to Choose Yarn and Hooks for a Polished Tote

Start your tote with smooth cotton yarn and a firm swatch so you can judge its structure before committing to the full project.
Which Yarn Fibers and Weights Hold Their Shape?
Choose tightly plied cotton when you want clear stitches and a washable everyday bag. Cotton still stretches under weight, so match your expectations to the bag’s construction and intended load.
Use DK for fine motifs and lighter fabric. Choose worsted for a balance of stitch definition and working speed. Bulky cotton cord gives you thicker walls, though it also adds empty weight.
For raffia, check the material and care label closely. Your yarn might be paper-based, plant fiber, or a synthetic alternative, and each needs its own handling. Reserve loosely spun, fuzzy yarn for designs where a soft surface suits your goal.
How Does Hook Size Affect Drape and Stitch Density?
Use your pattern’s hook size as a starting point, then adjust after making a swatch in the actual stitch pattern. A smaller hook tightens your fabric; a larger hook creates more space between stitches.
Make a swatch at least 6 inches square, following the yarn’s care instructions before measuring it. Hold it upright and place a small everyday object against it to judge gaps and flexibility.
If you struggle to pull loops through, move up a hook size and check your gauge again. Aim for fabric you can work comfortably, with enough firmness for the chosen shape. Record your hook size beside the finished swatch measurements.
How Much Yarn Should You Buy?
Buy the amount listed in your chosen pattern, matching yardage and yarn weight. Ball counts alone are unreliable because different yarns contain different lengths per ball.
For a custom tote, weigh your swatch and measure its area. Divide your estimated bag surface area by the swatch area, then multiply by the swatch weight for a rough yarn estimate.
Include the base and straps in that calculation. Add about 15–20% for joining, sampling, and small changes. For colorwork, estimate each shade separately and buy matching dye lots together. Keep your labels until the project is finished.
Finishing Details That Make Crochet Totes Look Refined

Give your tote a refined finish by stabilizing load-bearing areas and checking that every visible edge sits evenly.
How Can You Keep Handles From Stretching?
Stabilize your crochet handles with woven cotton tape or lightweight webbing sewn along the underside. Cut both supports to the same finished length, allowing enough material at each end for secure attachment.
Let the reinforcement extend into the attachment area so the load reaches the bag body. Sew through several rows of sturdy fabric, using thread and a needle suited to your materials.
Test your tote with its intended contents before finishing the lining. Hang it briefly, then compare the handle lengths and inspect the attachment points. If you see pulling, spread the attachment across a wider area before using the bag.
When Should You Add a Lining or Base Support?
Add a lining when your stitch pattern has openings or you want interior pockets. Use a stable woven fabric, and fit it to your blocked bag with a little ease so the crochet keeps its intended shape.
Sew pockets onto the lining before assembling it. Attach the finished lining just below the upper edge, checking that your stitches stay discreet on the outside.
For a flatter bottom, fit a removable plastic canvas insert inside a fabric sleeve. Round its corners and size it slightly smaller than the interior base. Remove the insert before washing, and follow the care needs of both your yarn and lining.
How Do You Finish Seams and Edges Neatly?
Match your seam method to the fabric and the look you want. Use mattress stitch for a subtle panel join, or work a consistent slip-stitch seam when you want a visible outline.
Clip or pin your pieces together before sewing, matching corners and row markers. Check alignment every few inches so you catch creeping edges early.
Weave yarn ends through dense stitches in more than one direction, keeping them hidden from the outside. Follow your pattern’s border stitch count, then lay the tote flat to check for waves or tight spots. Correct uneven sections before securing the last end, and block according to your yarn label.