You can create 16+ crochet baby blanket Keepsakes to Welcome a New Arrival with washable yarn, inviting textures, and personal touches that make your gift worth saving. Soft colors and handmade details give you a cozy project to enjoy now and a meaningful keepsake to share.
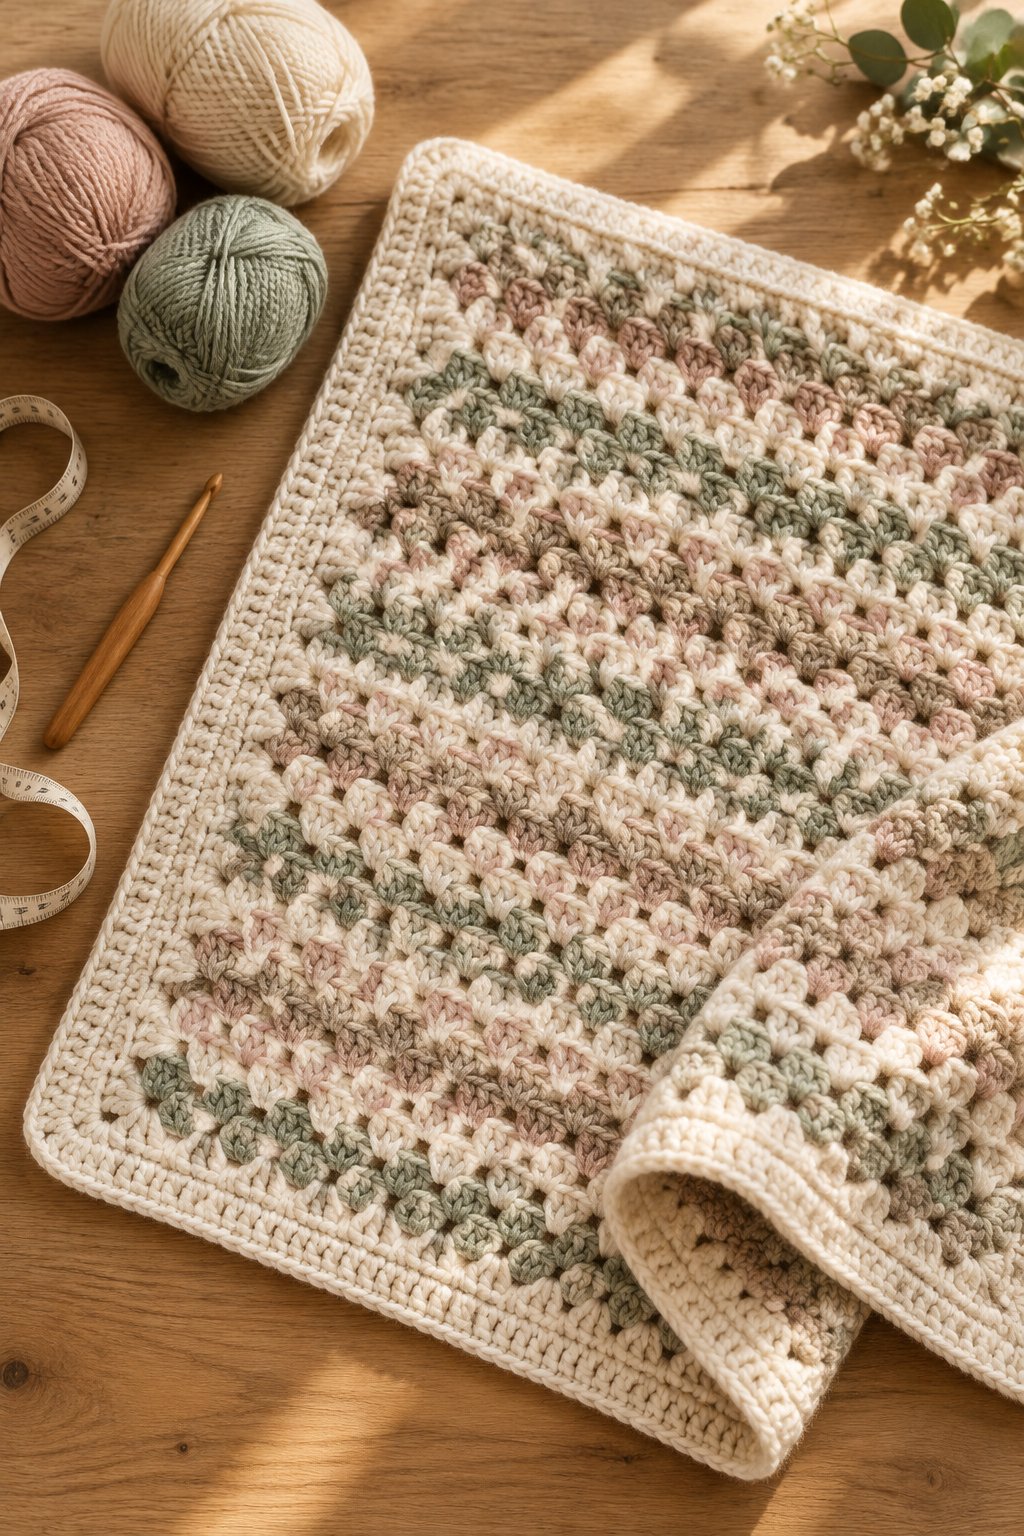
You’ll find room for your own style through embroidered names, color changes, and different borders. Treat these designs as project ideas, then follow a stitch pattern with a matching repeat count. The time estimates assume a roughly 30-by-36-inch blanket and vary with your pace and finishing details.
1) Personalized Moss Stitch Blanket With an Embroidered Name
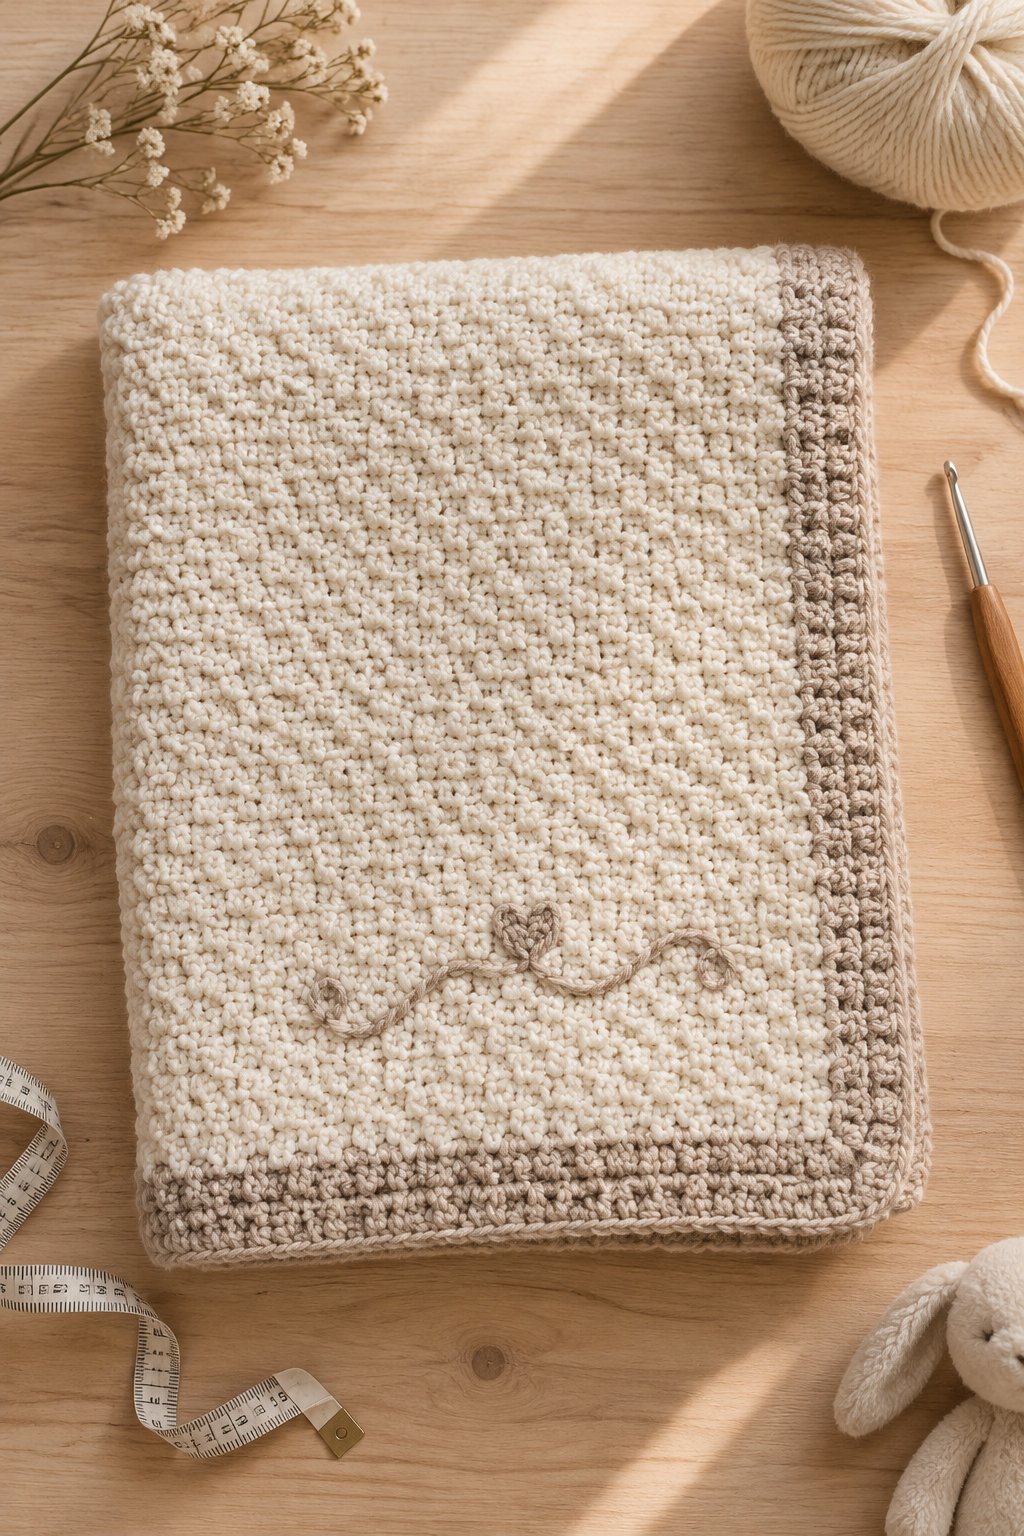
Give your blanket a personal focal point with an embroidered name against a neatly woven-looking moss stitch background. Choose oatmeal, blush, or pale blue, then use a deeper shade for lettering that stays easy to read.
Start with smooth, machine-washable worsted yarn and a 5 mm hook. Alternate single crochet and chain-one spaces, placing each new single crochet into the space below. Keep your turning chains consistent so both side edges stay straight.
You’ll find this beginner-friendly once your stitch placement feels familiar. Finish and wash the blanket before adding the name so you work on its settled shape. Sketch your lettering at full size on paper, then use removable basting stitches to guide placement. Leave enough space between letters to keep the embroidery from pulling the fabric inward.
|
Detail |
Specification |
|---|---|
|
Yarn Weight |
Worsted, #4 |
|
Skill Level |
Beginner |
|
Estimated Time |
12–18 hours |
2) Pastel Granny Square Blanket With a Cream Border
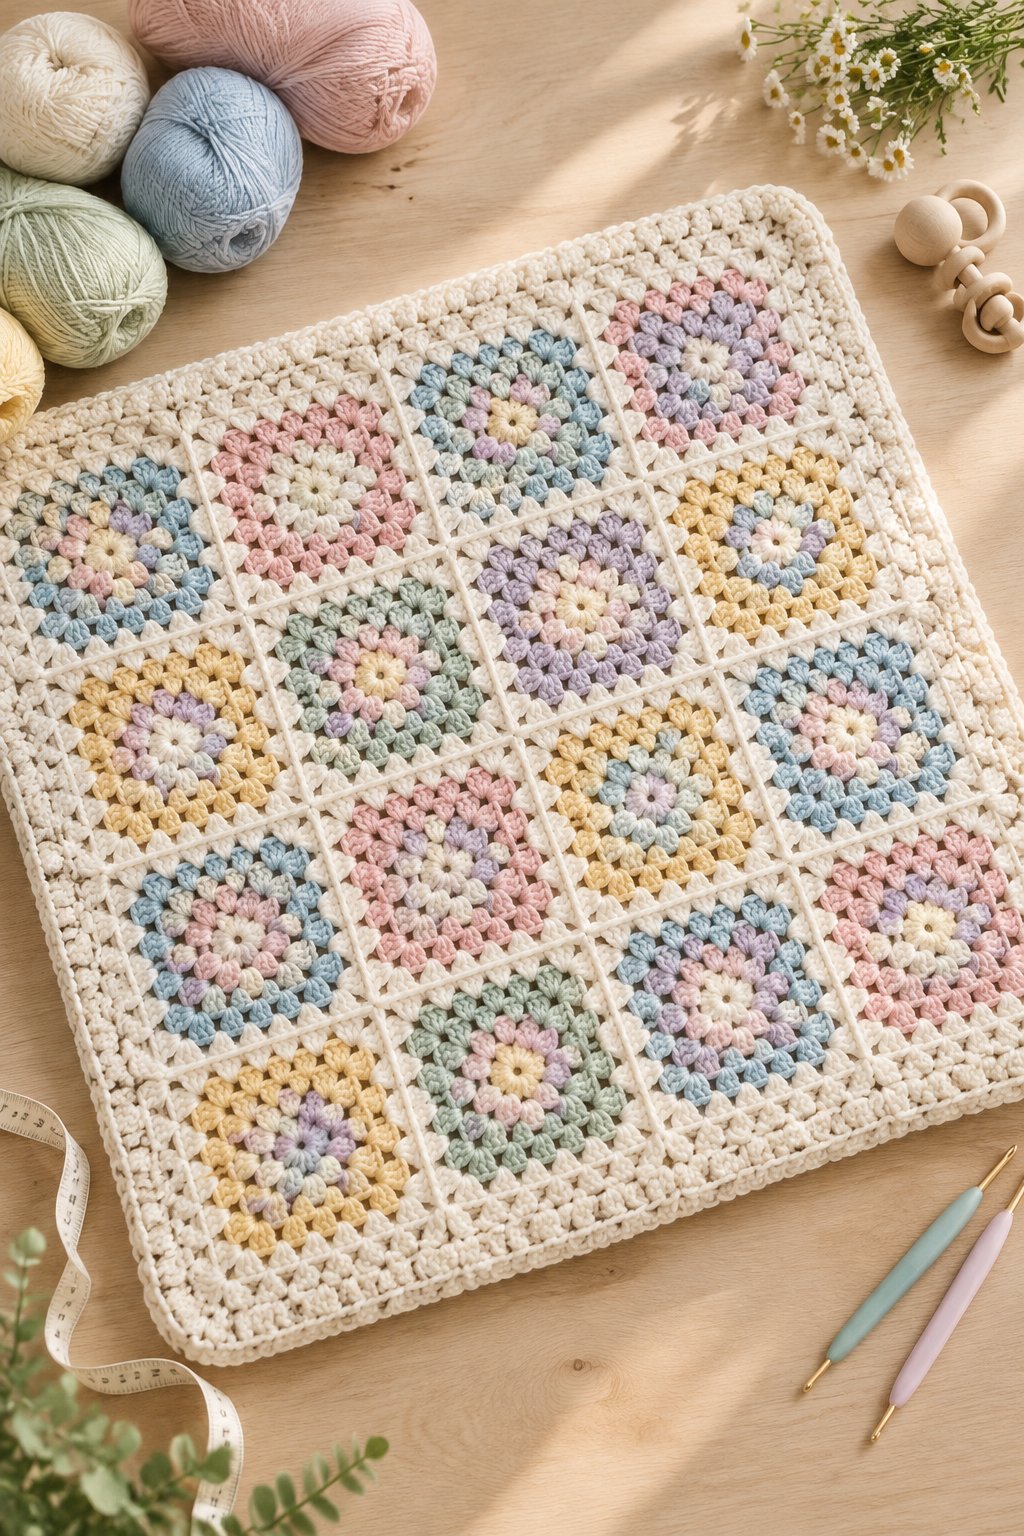
Build a cheerful patchwork blanket from pastel granny squares framed with cream. You’ll get a balanced design by repeating a small palette across the squares and giving every motif the same final round.
Choose washable DK yarn with a 4 mm hook for a lighter blanket. Work traditional double-crochet clusters and chain spaces, checking that each square has the same round count. A flat slip-stitch or whipstitch join keeps your seams tidy.
This easy project suits you if you enjoy short crochet sessions. Make one sample square, measure it after washing, and plan your grid from that finished size. Join the squares in rows, then add two or three cream border rounds. Keep your corner increases consistent, and lay the blanket flat after each round to check for rippling.
|
Detail |
Specification |
|---|---|
|
Yarn Weight |
DK, #3 |
|
Skill Level |
Easy |
|
Estimated Time |
16–24 hours |
3) Heirloom Shell Stitch Blanket With Scalloped Edges

Choose an ivory shell blanket when you want a soft, vintage look with a decorative edge. Your rows of curved stitch fans create a gentle pattern that looks lovely folded over a keepsake box.
Use smooth DK cotton-acrylic yarn and start with a 4 mm hook. Follow a shell repeat built from groups of double crochet anchored with shorter stitches. Select a pattern with modest spaces between shells for a closer fabric.
You’ll need easy-level skills, including counting repeats and working several stitches into one spot. Make a two-repeat swatch before calculating your starting chain. Finish the body with a leveling row if your pattern includes one, then add scallops around the edge. Match each scallop’s placement to the underlying stitches so your border lies flat after washing.
|
Detail |
Specification |
|---|---|
|
Yarn Weight |
DK, #3 |
|
Skill Level |
Easy |
|
Estimated Time |
14–22 hours |
4) Soft Ombre Ripple Blanket

Bring flowing color into your project with an ombre ripple blanket in seafoam, peach, or lavender. Your peaks and valleys add movement while gradual shade changes keep the finished rectangle visually calm.
Pick a smooth worsted ombre yarn and try a 5 mm hook. Use a written ripple pattern with paired increases at the peaks and matching decreases in the valleys. Place markers at the first few peaks while you learn the repeat.
This easy design suits you once you’re comfortable with double crochet and basic decreases. Check your stitch count after every row during the first several inches. If you use separate colors, change shades at a row end and carry the same stripe sequence throughout. Keep the top and bottom rippled for a coordinated finish.
|
Detail |
Specification |
|---|---|
|
Yarn Weight |
Worsted, #4 |
|
Skill Level |
Easy |
|
Estimated Time |
12–20 hours |
5) Teddy Bear Applique Blanket With Gingham Squares
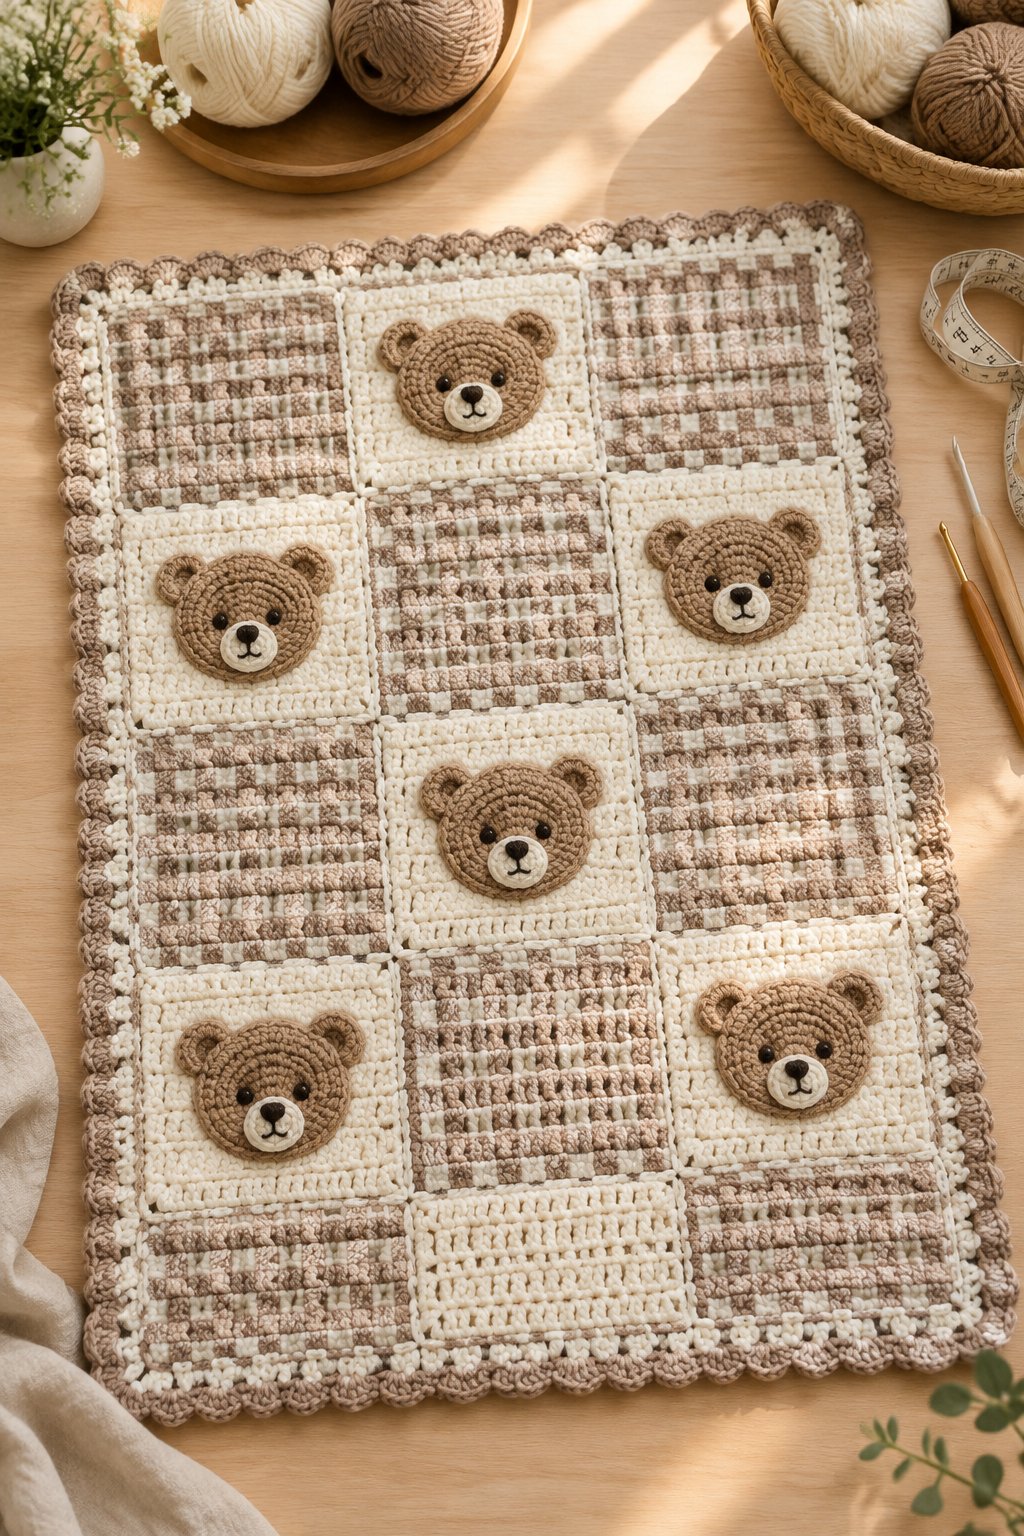
Pair a flat teddy bear appliqué with gingham blocks for a playful blanket you’ll enjoy giving at a baby shower. Cream, honey, and warm brown create a coordinated palette without hiding the bear’s outline.
Work with washable worsted yarn and a 5 mm hook. Build equal-size single-crochet squares, arranging light, medium, and dark tones in a gingham layout. Crochet your bear separately using flat circles and shaped pieces.
Set aside intermediate-level finishing time for joining and appliqué placement. Lay out the entire grid before sewing so you can check the repeating color order. Position the bear near one corner, leaving the center comfortable for supervised floor play. Embroider its face with yarn, and sew every appliqué edge securely. Keep your stitches shallow enough to avoid puckering the background.
|
Detail |
Specification |
|---|---|
|
Yarn Weight |
Worsted, #4 |
|
Skill Level |
Intermediate |
|
Estimated Time |
22–32 hours |
6) Raised Heart Bobble Stitch Blanket

Let raised hearts supply the decoration when you want a single-color blanket with plenty of texture. Your bobbles stand out clearly in dusty rose, butter yellow, or soft cream.
Choose a smooth worsted acrylic or cotton-acrylic yarn, starting with a 5 mm hook. Follow a bobble-heart chart worked against a single-crochet background. Use the chart’s specified bobble size, since changing the number of loops changes the motif’s scale.
You’ll find this an intermediate project because every heart needs careful placement. Mark the first stitch of each chart repeat and count the plain stitches between bobbles. Work your sample through one complete heart before starting the blanket. Keep a flat margin around the motifs, then finish with a narrow single-crochet border that leaves the raised shapes as your main feature.
|
Detail |
Specification |
|---|---|
|
Yarn Weight |
Worsted, #4 |
|
Skill Level |
Intermediate |
|
Estimated Time |
20–30 hours |
7) Classic Basketweave Blanket With a Ribbed Border

Create a substantial, woven-looking blanket with basketweave blocks and a ribbed frame. Your texture will show clearly in a solid shade such as cream, warm gray, or muted green.
Use washable worsted yarn and test a 5.5 mm hook to keep the fabric flexible. Alternate groups of front-post and back-post double crochet, reversing their placement at the intervals given in your pattern. Expect this dense texture to use extra yarn.
Choose this intermediate project for a keepsake with a structured appearance. Work a generous swatch and drape it over your hand to check softness. Add a stabilizing round before attaching a back-loop single-crochet ribbed border. Follow a border pattern with shaped corners, and check the attachment spacing frequently so the frame stays flat without drawing in the blanket.
|
Detail |
Specification |
|---|---|
|
Yarn Weight |
Worsted, #4 |
|
Skill Level |
Intermediate |
|
Estimated Time |
22–32 hours |
8) Daisy Granny Square Blanket With Sage Green Accents

Brighten your keepsake with white daisies, golden centers, and sage green square backgrounds. You’ll get a fresh floral look that works beautifully with a simple cream joining round.
Choose washable DK cotton-acrylic yarn and a 4 mm hook. Follow a daisy-square pattern using clustered petals, then work the surrounding rounds into a square. Keep the flowers flat and use the same yarn weight for every color.
This easy-to-intermediate design rewards careful counting during the petal round. Make all your centers first, then complete the petals in batches if you enjoy repeatable steps. Measure several finished squares before joining, especially if your tension changes between sessions. Arrange the flowers in a tidy grid and finish with a sage single-crochet border. Keep the final edging narrow to preserve the square proportions.
|
Detail |
Specification |
|---|---|
|
Yarn Weight |
DK, #3 |
|
Skill Level |
Intermediate |
|
Estimated Time |
20–30 hours |
9) Vintage-Inspired Filet Crochet Heart Blanket

Choose filet hearts for a light, lace-like keepsake with a clear geometric pattern. In white, pale pink, or soft blue, your filled and open mesh squares form hearts across a rectangular panel.
Use smooth sport-weight cotton or a cotton blend with a 3.5 mm hook as your starting point. Follow a filet chart that defines the stitches used in each open and filled square. Check the chart key before calculating your foundation chain.
You’ll need intermediate chart-reading skills, even though the main stitches are chains and double crochet. Mark each completed row on a paper copy or digital chart. Keep your chain spaces even, and wash your swatch before choosing final dimensions. Reserve the openwork design for supervised photo moments or display, and finish with a smooth border without dangling decorations.
|
Detail |
Specification |
|---|---|
|
Yarn Weight |
Sport, #2 |
|
Skill Level |
Intermediate |
|
Estimated Time |
24–36 hours |
10) Corner-to-Corner Rainbow Stripe Blanket
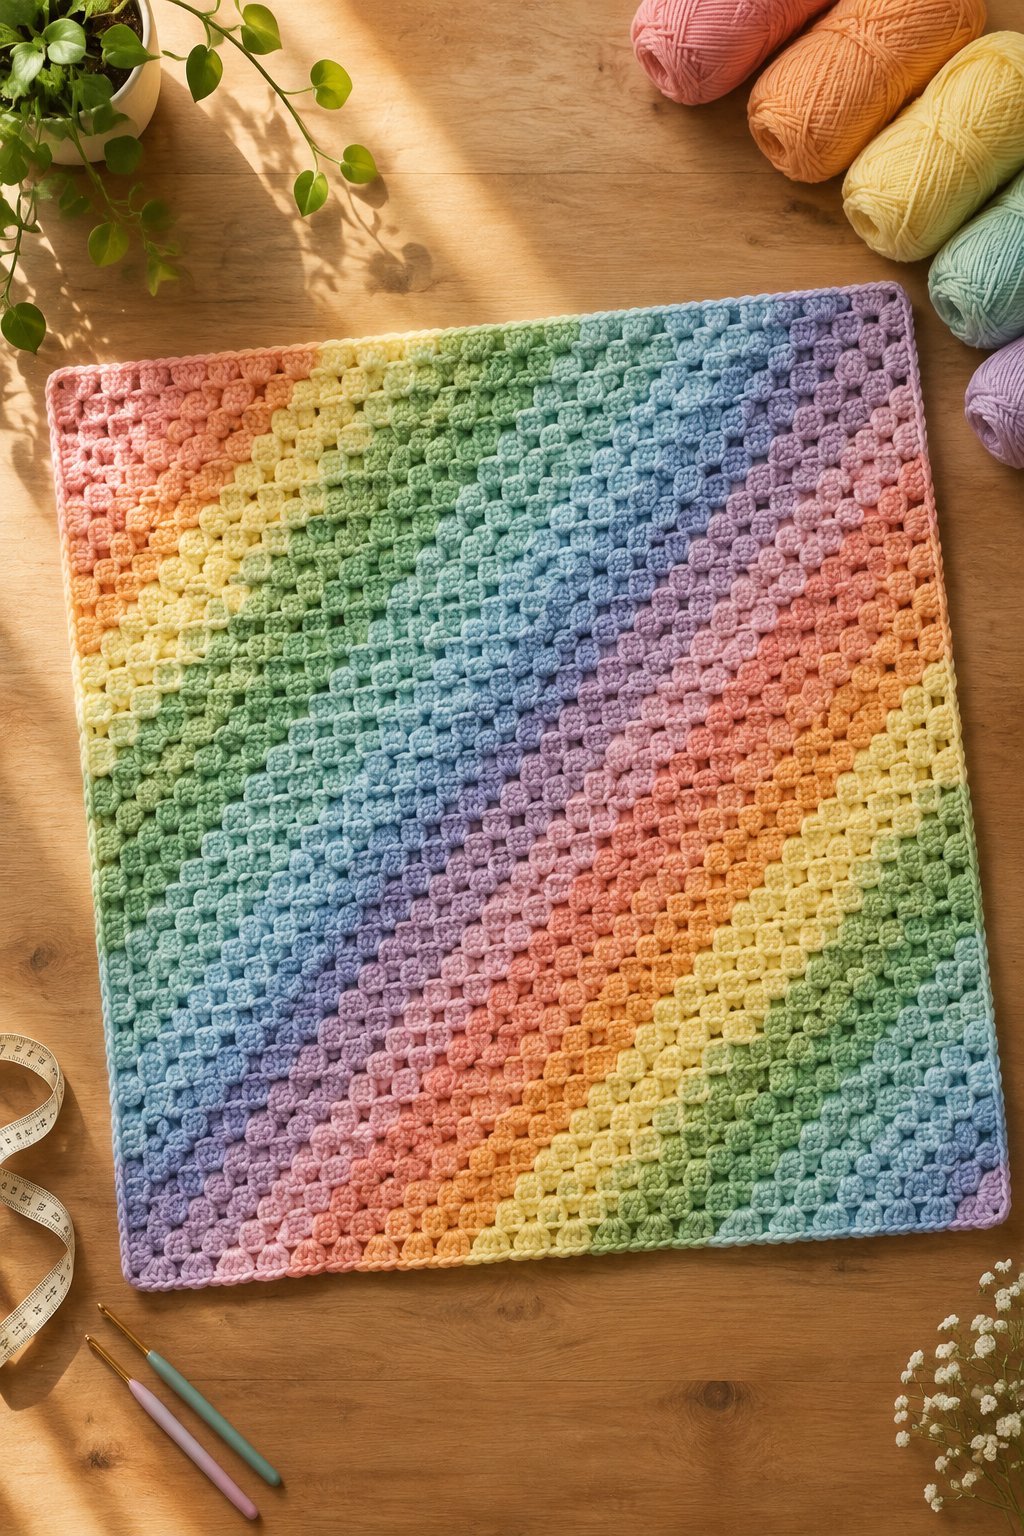
Turn rainbow colors into diagonal bands with a corner-to-corner blanket that grows from one small tile. Choose muted shades for a softer palette, or use clear brights against a cream border.
Start with washable worsted yarn and a 5 mm hook. Build your tiles with chains and double crochet, increasing along both sides until you reach the planned width. Follow rectangular corner-to-corner instructions to extend the length before decreasing both edges.
This easy project suits you once you understand the tile construction. Track color changes by diagonal row, and remember that longer rows use more yarn. Weave in each finished stripe’s ends before the blanket grows cumbersome. Add a small single-crochet border, adjusting stitch placement along the stepped edges until the frame sits flat without pulling.
|
Detail |
Specification |
|---|---|
|
Yarn Weight |
Worsted, #4 |
|
Skill Level |
Easy |
|
Estimated Time |
14–22 hours |
11) Chunky Half Double Crochet Blanket With Rounded Corners

Choose chunky half double crochet when you want a plush-looking keepsake with a simple stitch repeat. Your rounded border softens the rectangular shape, especially in shades such as oatmeal or pale peach.
Try a smooth, washable bulky yarn with a 6.5 mm hook. Work half double crochet through both loops for a solid surface. Use a swatch to check that the fabric bends easily and the stitches hold their shape.
This beginner project grows quickly, though bulky yarn adds weight. Keep the finished blanket modest in size and plan it for closely supervised lap use or keepsake display. Add a single-crochet border with evenly spaced increases around each corner to form gentle curves. Choose a tightly spun yarn if you want clear stitch visibility while learning to count your rows.
|
Detail |
Specification |
|---|---|
|
Yarn Weight |
Bulky, #5 |
|
Skill Level |
Beginner |
|
Estimated Time |
8–14 hours |
12) Cotton Gingham Blanket in Three Coordinating Shades

Build a crisp gingham pattern with light, medium, and dark shades from one color family. Your medium shade connects the pale and deep blocks, giving the blanket its familiar checked effect.
Use soft DK cotton and begin with a 4 mm hook. Work single crochet with tapestry-style color changes, carrying the unused strand inside your stitches. Follow a chart that sets both the block width and the number of rows per block.
Allow intermediate-level practice time to manage the carried yarn. Spread the stitches along your hook before tightening a color change so the fabric keeps its width. Check that your blocks look square after washing a sample. Finish with the lightest shade for a clean frame, and choose cotton labeled for the wash routine your recipient plans to use.
|
Detail |
Specification |
|---|---|
|
Yarn Weight |
DK, #3 |
|
Skill Level |
Intermediate |
|
Estimated Time |
22–32 hours |
13) Woodland Fox Tapestry Crochet Blanket

Make a woodland fox your blanket’s centerpiece with rust, cream, and charcoal stitches against a pale background. A generous plain margin gives your motif space and keeps its pointed ears easy to recognize.
Choose smooth worsted yarn with a 4.5–5 mm hook, adjusting for a firm but flexible fabric. Follow a single-crochet colorwork chart and complete each color change on the final pull-through of the preceding stitch.
You’ll need intermediate skills to manage several strands and read the chart in alternating directions. Use small bobbins for separate color areas to limit tangles. Keep any carried strands enclosed within your stitches, and avoid loose floats across the back. Check the fox’s proportions in a swatch because stitch shape affects the image. Add a plain border that repeats your background color.
|
Detail |
Specification |
|---|---|
|
Yarn Weight |
Worsted, #4 |
|
Skill Level |
Intermediate |
|
Estimated Time |
26–40 hours |
14) Llama Applique Blanket With Desert-Toned Stripes
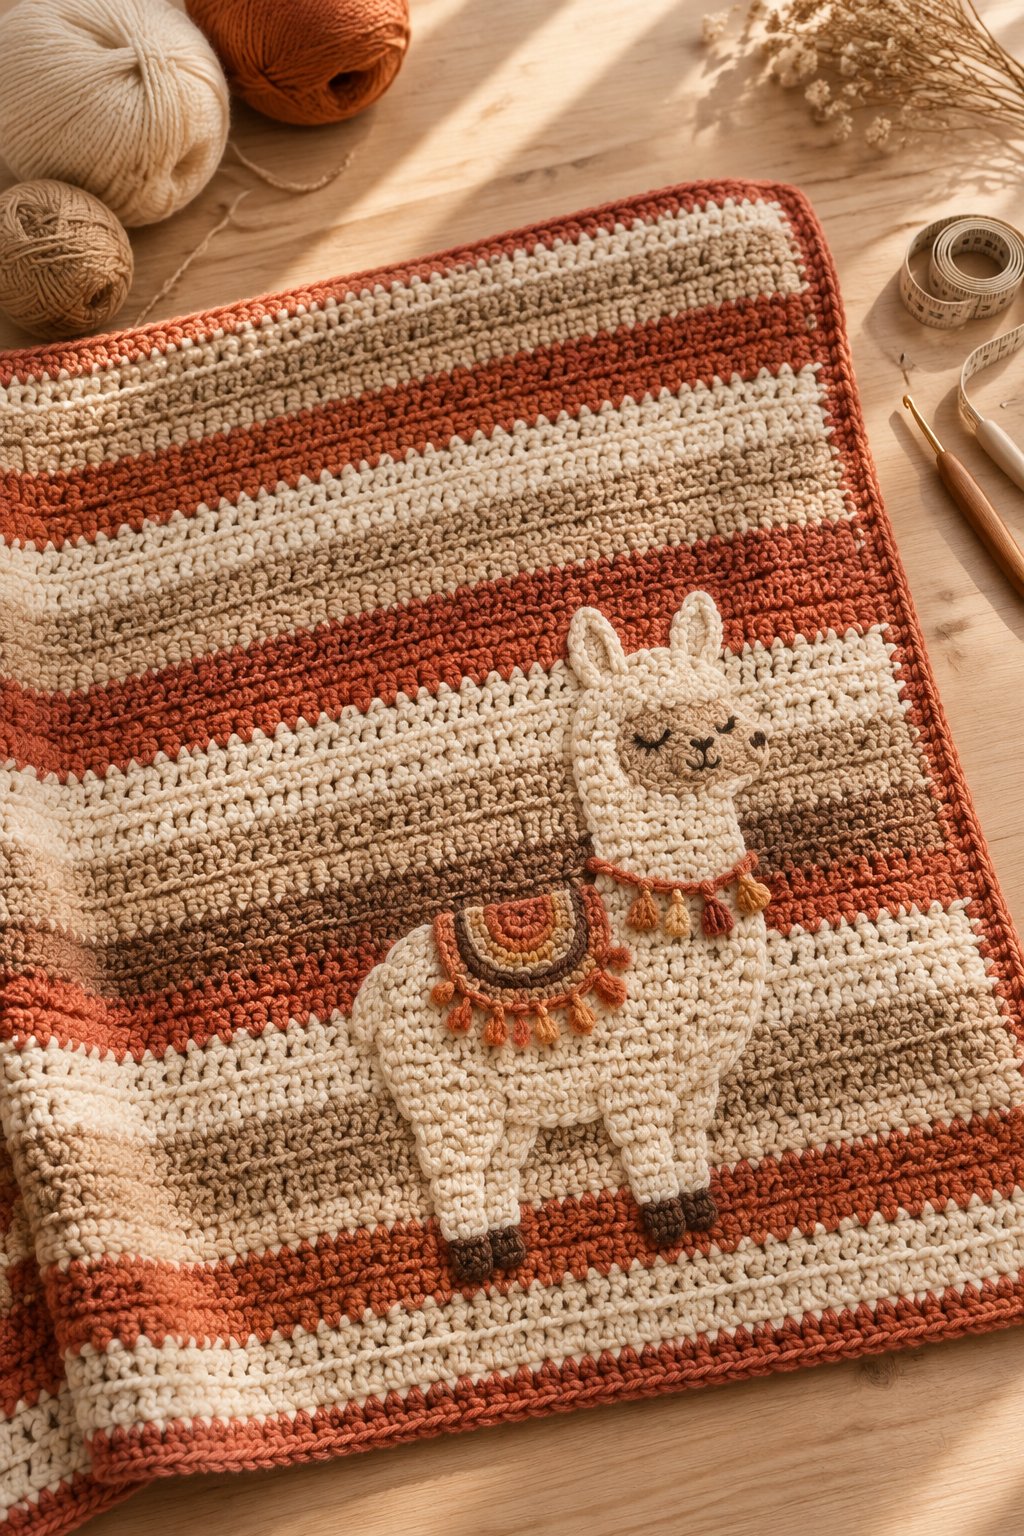
Combine desert-toned stripes with a cream llama appliqué for a warm, playful keepsake. Your terracotta, sand, and muted teal bands give the simple animal shape a colorful backdrop.
Use washable worsted cotton-acrylic yarn with a 5 mm hook for the blanket. Half double crochet produces an approachable striped base. Work the flat appliqué with a slightly smaller hook to keep its outline neat, following a pattern for the shaped body and neck.
You’ll find the blanket easy and the assembly intermediate. Finish the stripes before deciding where to place the llama, then baste it near a lower corner. Embroider the face and use stitched colorwork for a tiny saddle detail. Sew down the ears and legs along their full edges, keeping the back of your attachment stitching tidy.
|
Detail |
Specification |
|---|---|
|
Yarn Weight |
Worsted, #4 |
|
Skill Level |
Intermediate |
|
Estimated Time |
18–28 hours |
15) Textured Alpine Stitch Blanket in Dusty Blue

Give your blanket a field of raised diamond-like texture with alpine stitch in dusty blue. A solid color helps you see the staggered posts and gives the finished fabric a calm appearance.
Start with smooth worsted washable yarn and a 5.5 mm hook. Follow an alpine stitch pattern that combines single-crochet rows with alternating double crochet and front-post treble crochet. Work each raised post around the designated stitch below.
This intermediate design needs careful attention to post placement and stitch height. Pull your tall stitches up to the working row’s height so they leave the fabric relaxed. Swatch several repeats, then check for curling before committing to the full width. Finish with a flat single-crochet frame in the same blue, keeping the border narrow beside the richly textured center.
|
Detail |
Specification |
|---|---|
|
Yarn Weight |
Worsted, #4 |
|
Skill Level |
Intermediate |
|
Estimated Time |
22–34 hours |
16) Crochet Cable Blanket With a Simple Frame Border

Frame a few crochet cables with smooth stitch panels for a keepsake with a classic knitted appearance. Your cable crossings show well in cream, pale gray, or a soft heathered shade.
Choose washable worsted yarn with clear stitch definition and try a 5.5 mm hook. Follow a cable pattern using crossed front-post stitches, with plain stitches between the raised columns. Check the pattern’s instructions for working in front of or behind skipped posts.
Plan this as an intermediate project with extra time for practice. Complete one full cable repeat in your swatch before measuring gauge, since crossings draw the fabric inward. Place markers between panels to catch counting errors early. Add several rounds of single crochet as a quiet frame, increasing at the corners according to your border pattern.
|
Detail |
Specification |
|---|---|
|
Yarn Weight |
Worsted, #4 |
|
Skill Level |
Intermediate |
|
Estimated Time |
28–40 hours |
How to Choose Yarn, Hooks, and Blanket Size
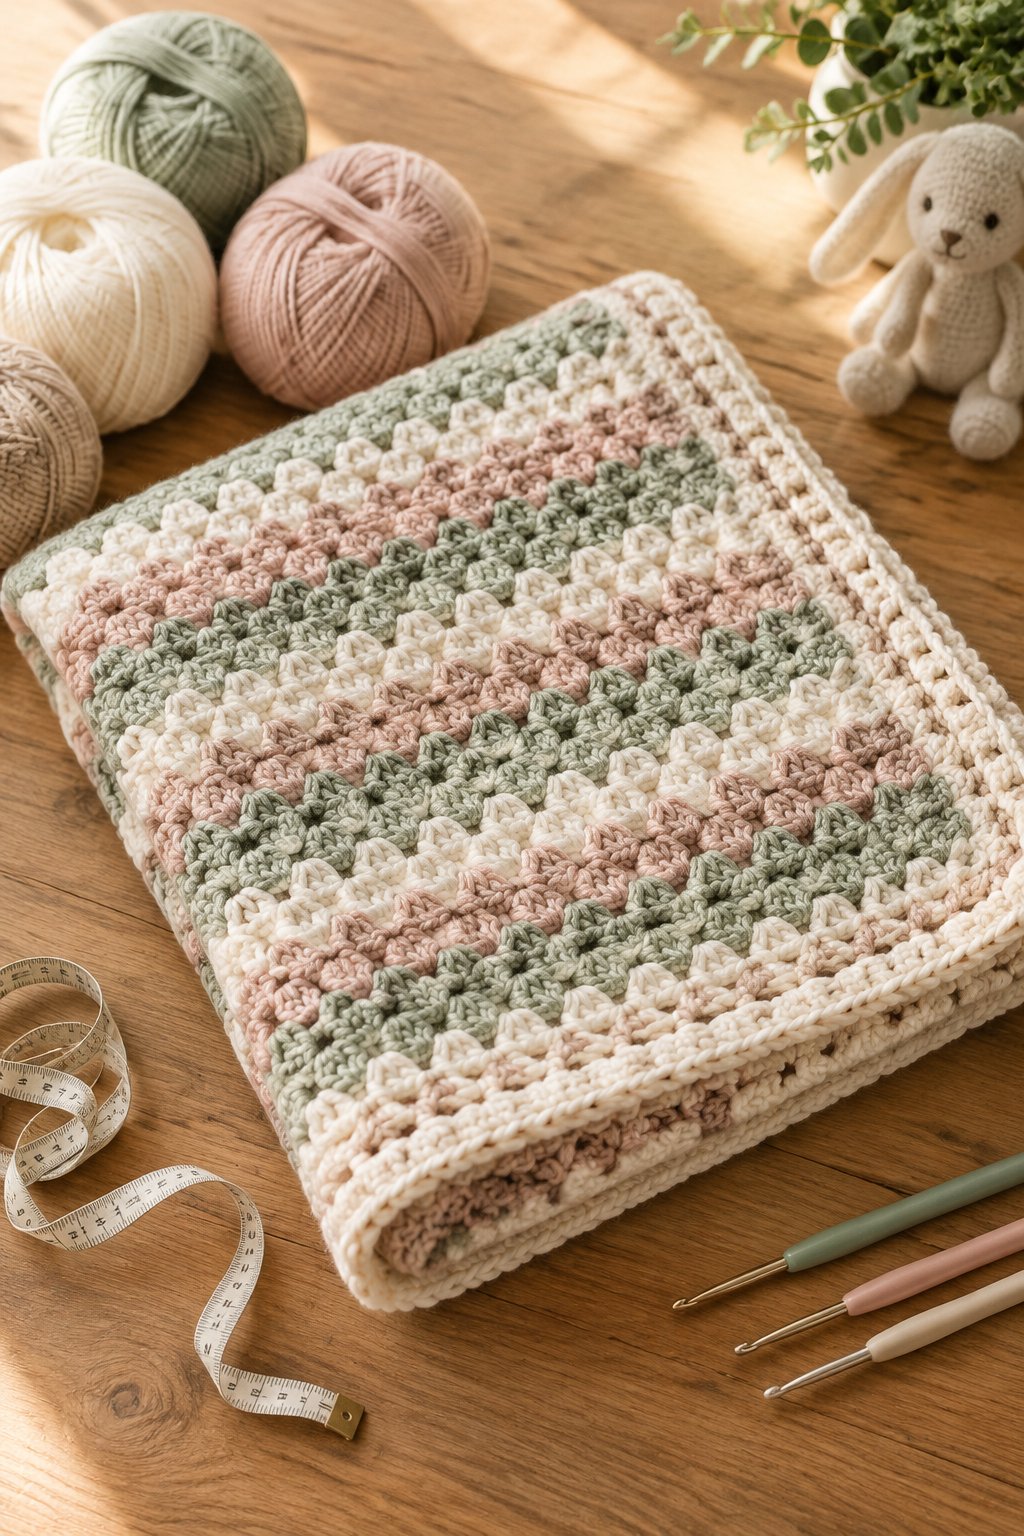
Choose your materials around a washable, flexible fabric and a finished size suited to supervised use. Start with the yarn label, then confirm your choice with a washed swatch.
Which Yarn Fibers Feel Soft and Wash Well?
Look for smooth acrylic, soft cotton, or a cotton-acrylic blend with clear care instructions. Acrylic offers a lightweight option, while cotton gives you a more substantial fabric with less stretch. Check softness against your inner wrist before buying enough for the project.
Choose firmly constructed yarn that holds together when you rub a sample strand between your fingers. Loosely attached fibers and shedding novelty yarn add maintenance concerns. Ask your recipient about fiber sensitivities and preferred laundry care before choosing wool or an animal-fiber blend.
How Do Yarn Weight and Gauge Affect Hook Choice?
Use the suggested hook sizes as starting points, then adjust after checking your fabric. A larger hook opens the stitches and increases drape; a smaller hook produces a firmer surface. Aim for stitches that move easily without large gaps.
Make a swatch at least 6 inches square in your chosen stitch. Wash and dry it according to the yarn label, then measure the center 4 inches. Use that gauge to calculate your starting width while keeping the pattern’s stitch multiple intact.
What Finished Dimensions Suit Your Intended Use?
Plan your dimensions before buying yarn, and include the border in your total. These sizes give you useful starting points:
- Small keepsake or supervised lap blanket: About 24 by 30 inches.
- Supervised floor-time blanket: About 30 by 36 inches.
- Larger blanket for later childhood: About 36 by 42 inches.
A dense texture feels heavier than open stitches at the same size. For a newborn gift, choose a manageable size and include clear use guidance with your care note. Measure the washed blanket flat without stretching it.
How to Finish and Preserve a Baby Blanket Keepsake
Finish your blanket with secure stitching, clear care instructions, and storage that keeps it clean and dry. Complete a close inspection before wrapping your gift.
How Can You Secure Embroidery, Appliques, and Loose Ends?
Weave yarn tails through several inches of matching stitches, changing direction to help hold them in place. Leave enough tail for a secure finish before trimming. Check both sides for exposed loops after gently stretching the fabric.
Attach appliqués around their full perimeter and secure any inner areas that lift away from the blanket. Use embroidered facial details and keep the surface free of buttons, beads, and glued-on pieces. Check your work again after the first wash, paying close attention to color changes and joins.
When Is a Handmade Blanket Appropriate for Supervised Use?
Use your blanket during awake, closely supervised floor time, held cuddles, or brief photo sessions. Keep your baby’s face uncovered and remove the blanket if it bunches near the mouth or nose. Check for overheating, especially with dense or bulky fabrics.
For sleep during the first year, place your baby on their back on a firm, flat, approved sleep surface with a fitted sheet. Keep blankets and other loose items out of the sleep space. Use properly fitted sleep clothing or a wearable blanket for warmth, and move a sleeping baby from floor play to their safe sleep space.
How Should You Wash, Label, and Store the Finished Blanket?
Wash your finished blanket using the yarn label’s instructions, and choose a fragrance-free detergent if your recipient prefers it. Use a mesh laundry bag when appropriate for the blanket’s size and construction. Reshape the edges during drying, and let every layer dry fully before folding.
Give your recipient a separate care card with the fiber content, washing directions, finished measurements, and date. For keepsake storage, fold the clean blanket with acid-free tissue and place it in a breathable storage box away from sunlight and damp areas. Refold it along different lines periodically, and inspect the appliqués and woven ends before returning it to use.