Your search for “17+ things to crochet When You Have Leftover Yarn and Zero Ideas” starts with small accessories and cozy home accents that put your scraps to work. You get the colorful patchwork look with yarn you already own, plus handmade designs worth saving for your next creative afternoon.
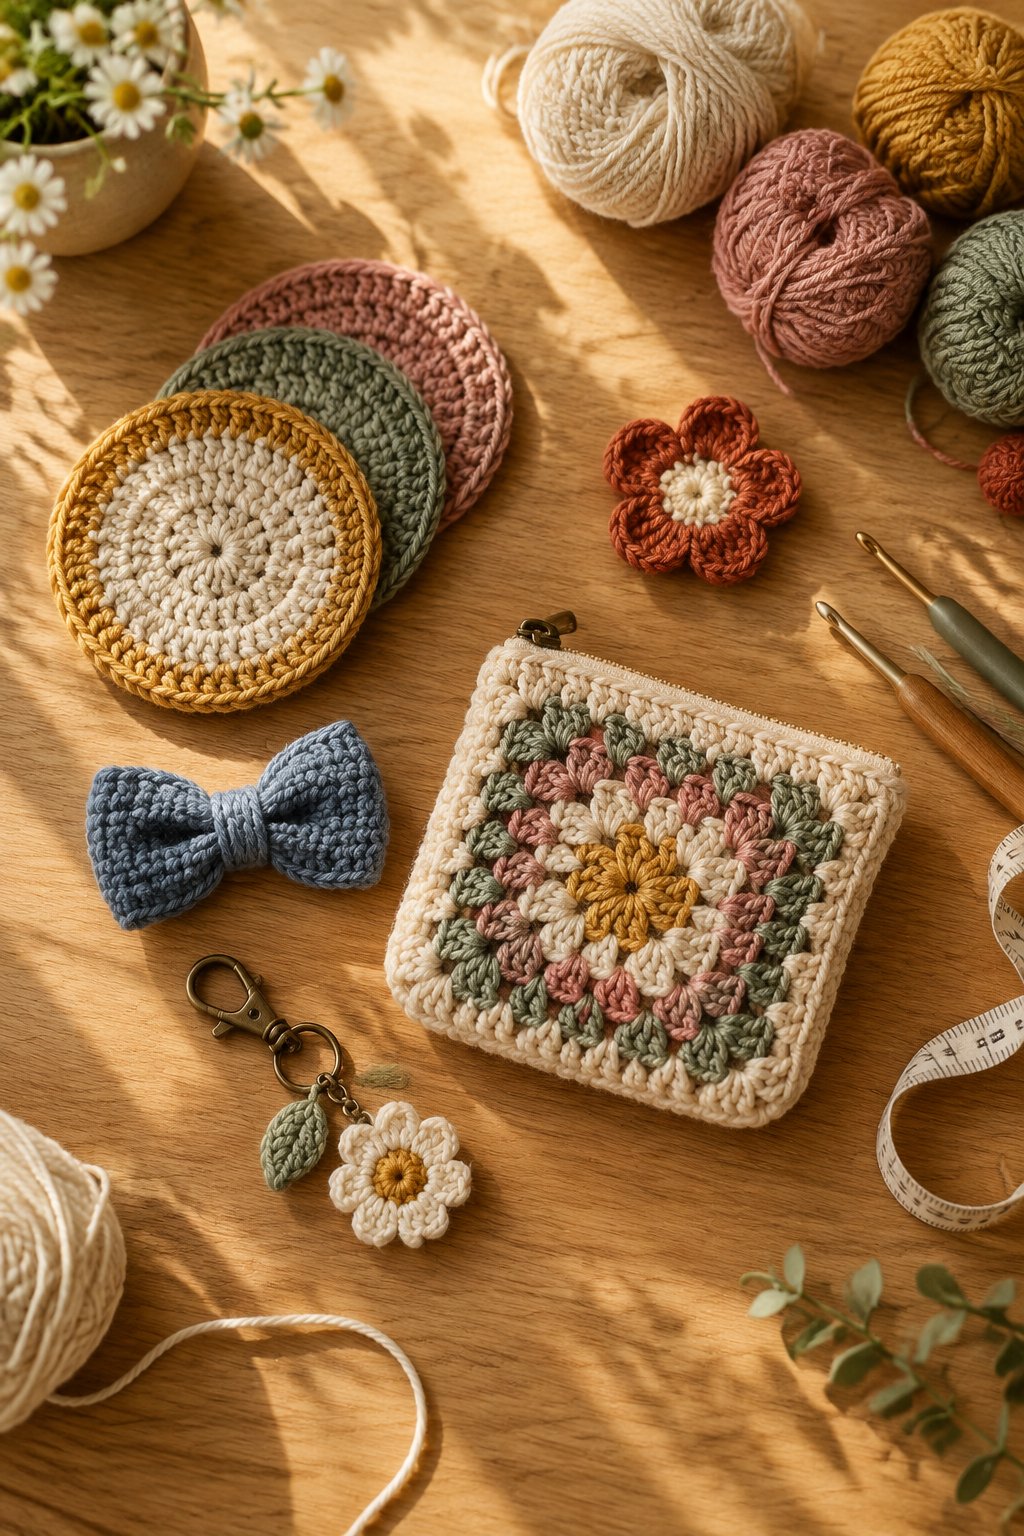
You have plenty of room to experiment, whether your leftovers fill a basket or fit inside a sandwich bag. Start with similar yarn weights, keep your smallest pieces for accents, and treat the time estimates below as planning ranges that change with your pace and project size.
1) Colorful Granny Square Coasters

You turn short cotton leftovers into useful coasters with just a few granny square rounds. Choose a bright center and a cream border for a cheerful, framed look, or repeat one edge color across a mismatched set.
Use worsted-weight cotton with a 4–5 mm hook. Your main stitches are chains, slip stitches, and double crochet clusters, making this an easy project once you know the basics. Aim for a finished square about 4–5 inches wide, then check that your mug sits comfortably inside the border.
Add a round of single crochet to firm up the edges. If your corners curl, check your tension and corner spaces before blocking. Make four coordinating squares for a small housewarming gift, and include a care tag based on your yarn labels.
|
Detail |
Specification |
|---|---|
|
Yarn Weight |
Worsted, #4 cotton |
|
Skill Level |
Easy |
|
Estimated Time |
30–60 minutes each |
2) Textured Cotton Dishcloths
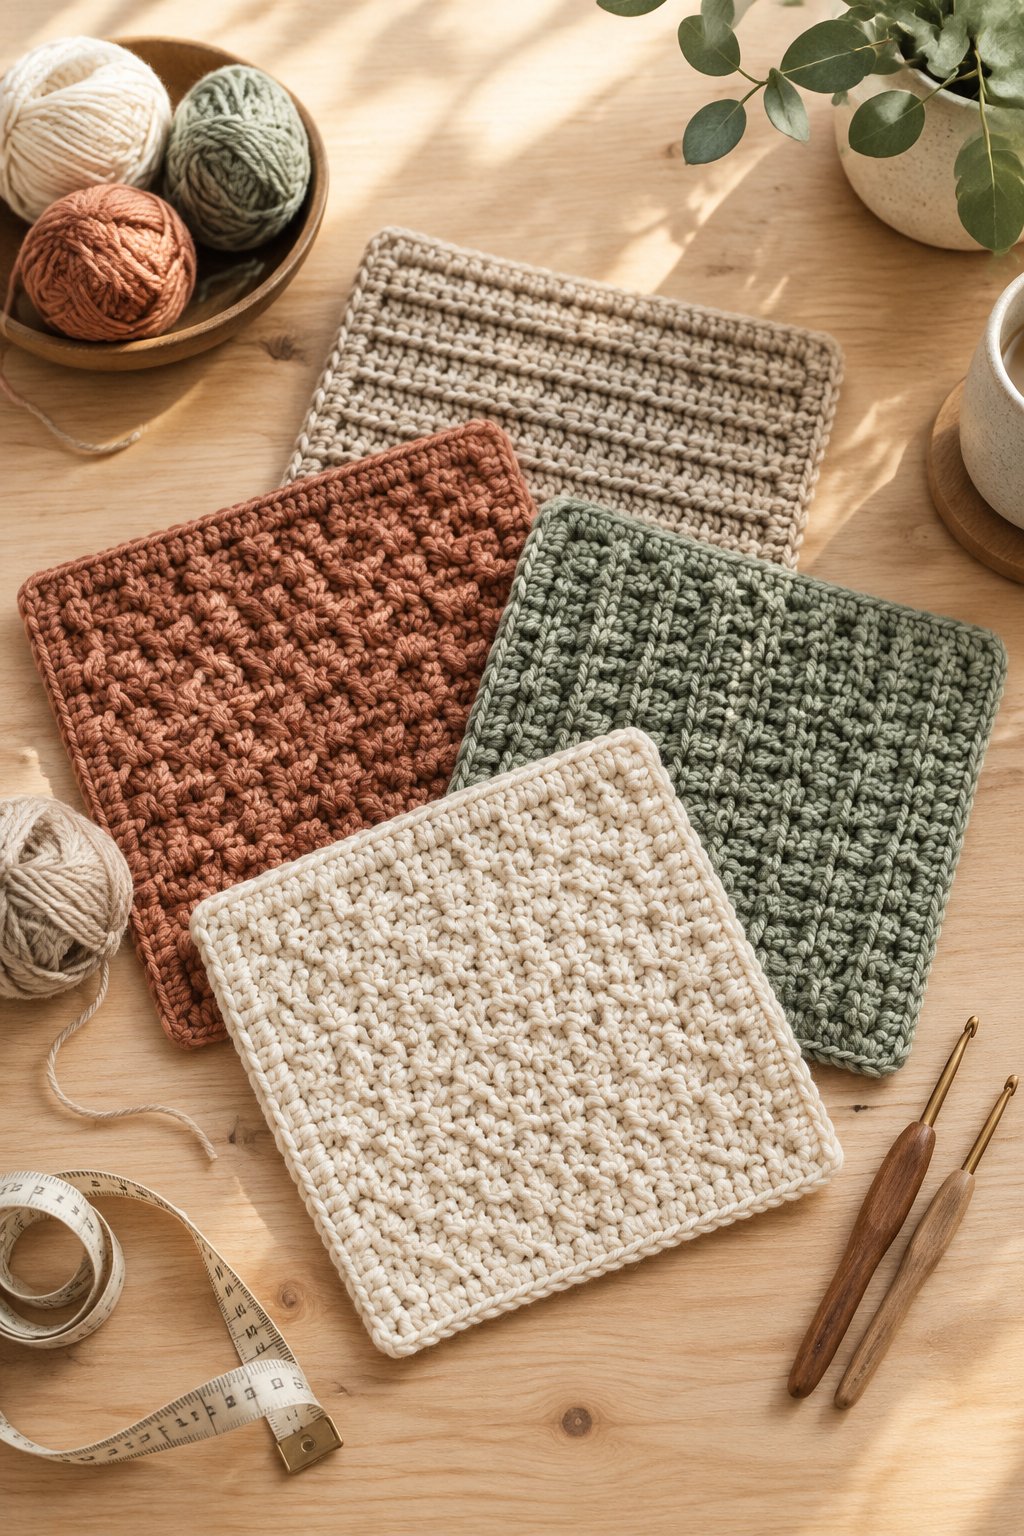
A textured dishcloth gives your leftover cotton a hardworking place beside the sink. Try sage and cream stripes for a soft kitchen palette, or use a narrow contrast border to make a plain square feel finished.
Choose worsted-weight cotton and a 4.5–5 mm hook. Alternate single crochet and double crochet for a simple pebbled texture, keeping your stitch count consistent at each edge. An 8-inch square gives you a practical starting size without requiring a full skein.
Keep the fabric flexible enough to wring out easily. After your first wash, check whether your cloth has changed size before making a matching stack. You’ll get a beginner-friendly project that also works as reusable gift wrapping around a bar of soap. Leave a hanging loop at one corner if you want easier drying.
|
Detail |
Specification |
|---|---|
|
Yarn Weight |
Worsted, #4 cotton |
|
Skill Level |
Beginner |
|
Estimated Time |
1–2 hours |
3) Striped Drawstring Trinket Pouch

Your small yarn balls become a striped pouch with a round base and a softly gathered top. Pair dusty pink with mustard for a warm palette, or separate brighter leftovers with narrow neutral bands.
Use DK cotton and a 3.5–4 mm hook for a compact fabric. Begin with a flat single crochet circle, then stop increasing to build the sides. Once your pouch reaches roughly 4–5 inches tall, follow an eyelet round with a firm top edge.
Thread a crocheted chain through the openings and knot its ends securely. You’ll need basic increases and working-in-the-round skills, placing this at an easy level. Use your pouch for wrapped gifts or everyday trinkets; add a fabric lining when storing small earrings that might slip through stitch gaps.
|
Detail |
Specification |
|---|---|
|
Yarn Weight |
DK, #3 cotton |
|
Skill Level |
Easy |
|
Estimated Time |
1–3 hours |
4) Scrappy Crochet Scrunchies

Crocheting around a hair elastic gives your smallest soft scraps a colorful new job. You’ll get a ruffled ring that looks playful in mixed pastels, jewel tones, or two shades of the same color.
Choose smooth DK or worsted yarn with a 4–5 mm hook. Work single crochet around a sturdy, fabric-covered elastic, sliding your stitches together as you go. Add a round of double crochet increases for a fuller edge, checking that your elastic still stretches comfortably.
Keep your tension relaxed so the covering gathers without restricting the band. This beginner-friendly accessory makes a useful small gift, especially when you match the colors to the recipient’s wardrobe. For a subtler finish, use half double crochet in your outer round and skip the extra ruffle layer.
|
Detail |
Specification |
|---|---|
|
Yarn Weight |
DK #3 or worsted #4 |
|
Skill Level |
Beginner |
|
Estimated Time |
30–60 minutes |
5) Flower Bookmark With a Stem Tail
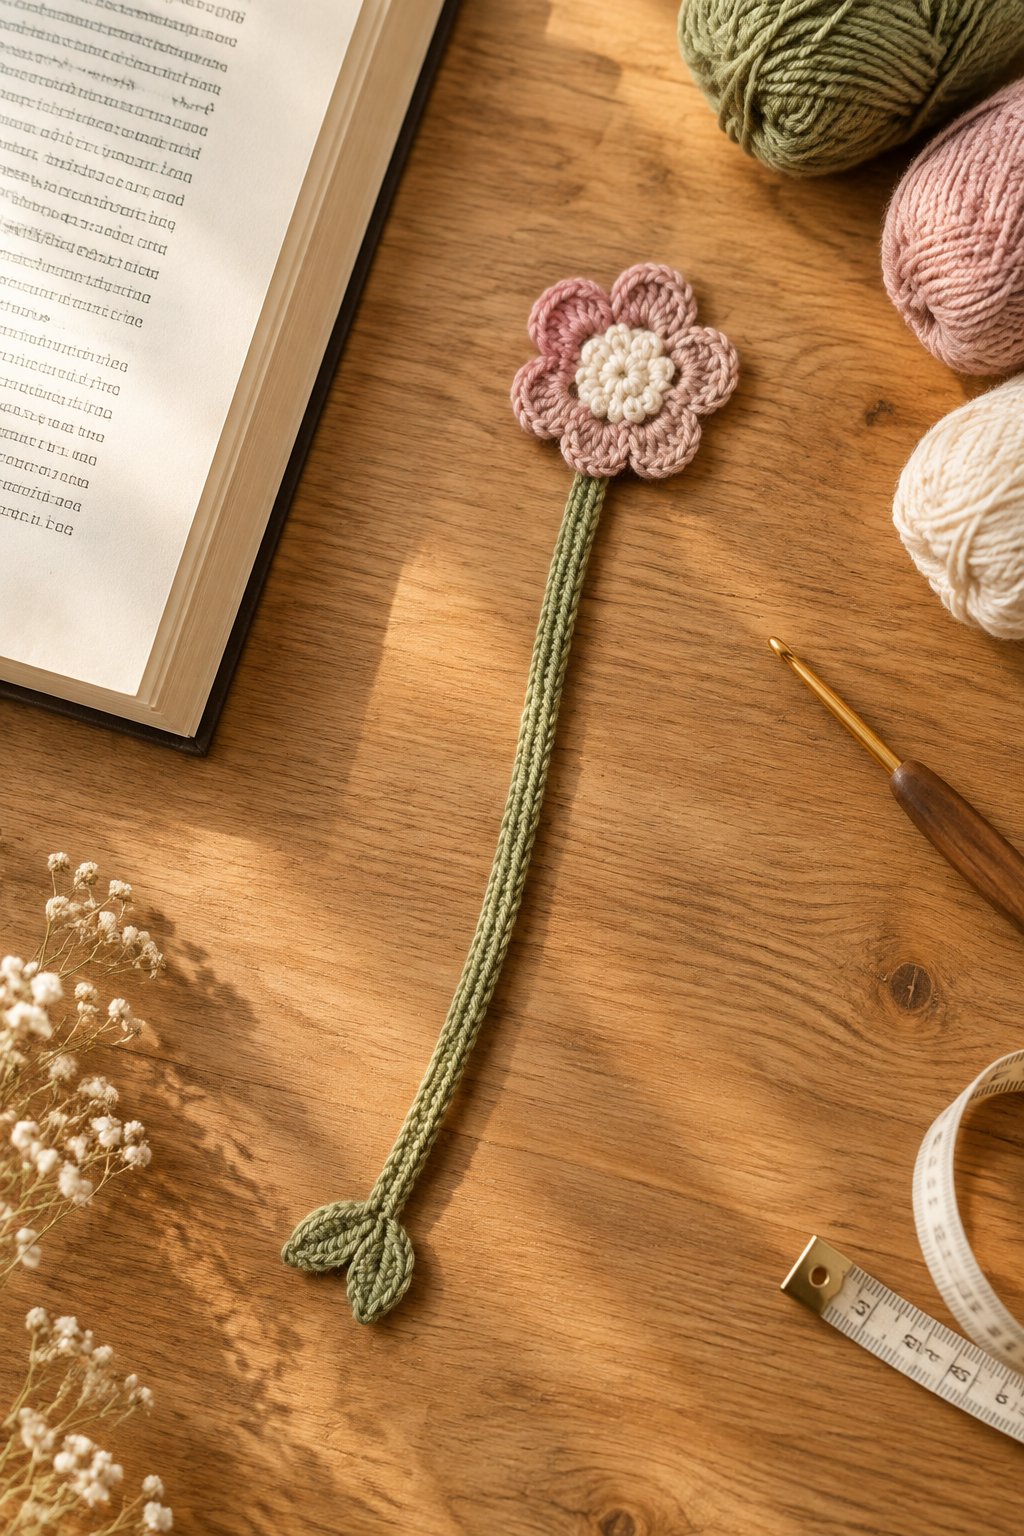
You get a cheerful page marker by pairing a flat crochet flower with a long green stem. A yellow center and white petals create a daisy look, while pink petals give your bookmark a softer finish.
Use fine cotton or crochet thread with a 2–3 mm hook, adjusting to your yarn label. Build your flower from a small center ring, then shape petals with short groups of taller stitches. Keep the center flat so it rests neatly near the top of your book.
Make a chain stem slightly longer than your book’s height and work slip stitches back along it. Add one small leaf near the end if you have extra green yarn. You’ll practice basic shaping on an easy project that slips neatly into a book-themed gift.
|
Detail |
Specification |
|---|---|
|
Yarn Weight |
Fine #2 cotton or thread |
|
Skill Level |
Easy |
|
Estimated Time |
30–90 minutes |
6) Button-Closure Mug Cozy

A buttoned mug cozy lets you fit a textured rectangle around your favorite handled cup. Choose oatmeal yarn with a deep green stripe for a cozy finish, then add a contrasting button as a small focal point.
Work with worsted cotton or washable wool and a 4–5 mm hook. Single crochet in the back loop creates simple ridges, while half double crochet gives you a slightly softer fabric. Measure around your mug, leaving space at the handle and keeping the upper edge below the drinking rim.
Finish one short edge with a chain loop sized to your button. You’ll have a beginner-friendly gift that feels personal when paired with a mug. Remove the cozy before microwaving or washing the cup, and check that the closure stays clear of your grip.
|
Detail |
Specification |
|---|---|
|
Yarn Weight |
Worsted, #4 |
|
Skill Level |
Beginner |
|
Estimated Time |
1–2 hours |
7) Mini Amigurumi Mushroom Keychain

Your tiniest contrasting scraps suit a mushroom keychain with a rounded cap and short stem. Try a red cap with cream embroidered spots, or choose lavender and pale pink for a softer woodland look.
Use smooth DK or worsted cotton with a 2.5–3.5 mm hook to create a firm fabric. You’ll work single crochet in continuous rounds, using increases and decreases to shape each part. Add small amounts of stuffing gradually so the stem keeps its shape without showing gaps.
This intermediate project calls for careful counting and neat assembly. Attach your keychain loop through several secure stitches near the top, then check the connection with a gentle tug. Keep your mushroom as an adult accessory; the hardware and small parts require care around young children.
|
Detail |
Specification |
|---|---|
|
Yarn Weight |
DK #3 or worsted #4 |
|
Skill Level |
Intermediate |
|
Estimated Time |
1–3 hours |
8) Twisted Ribbed Ear Warmer
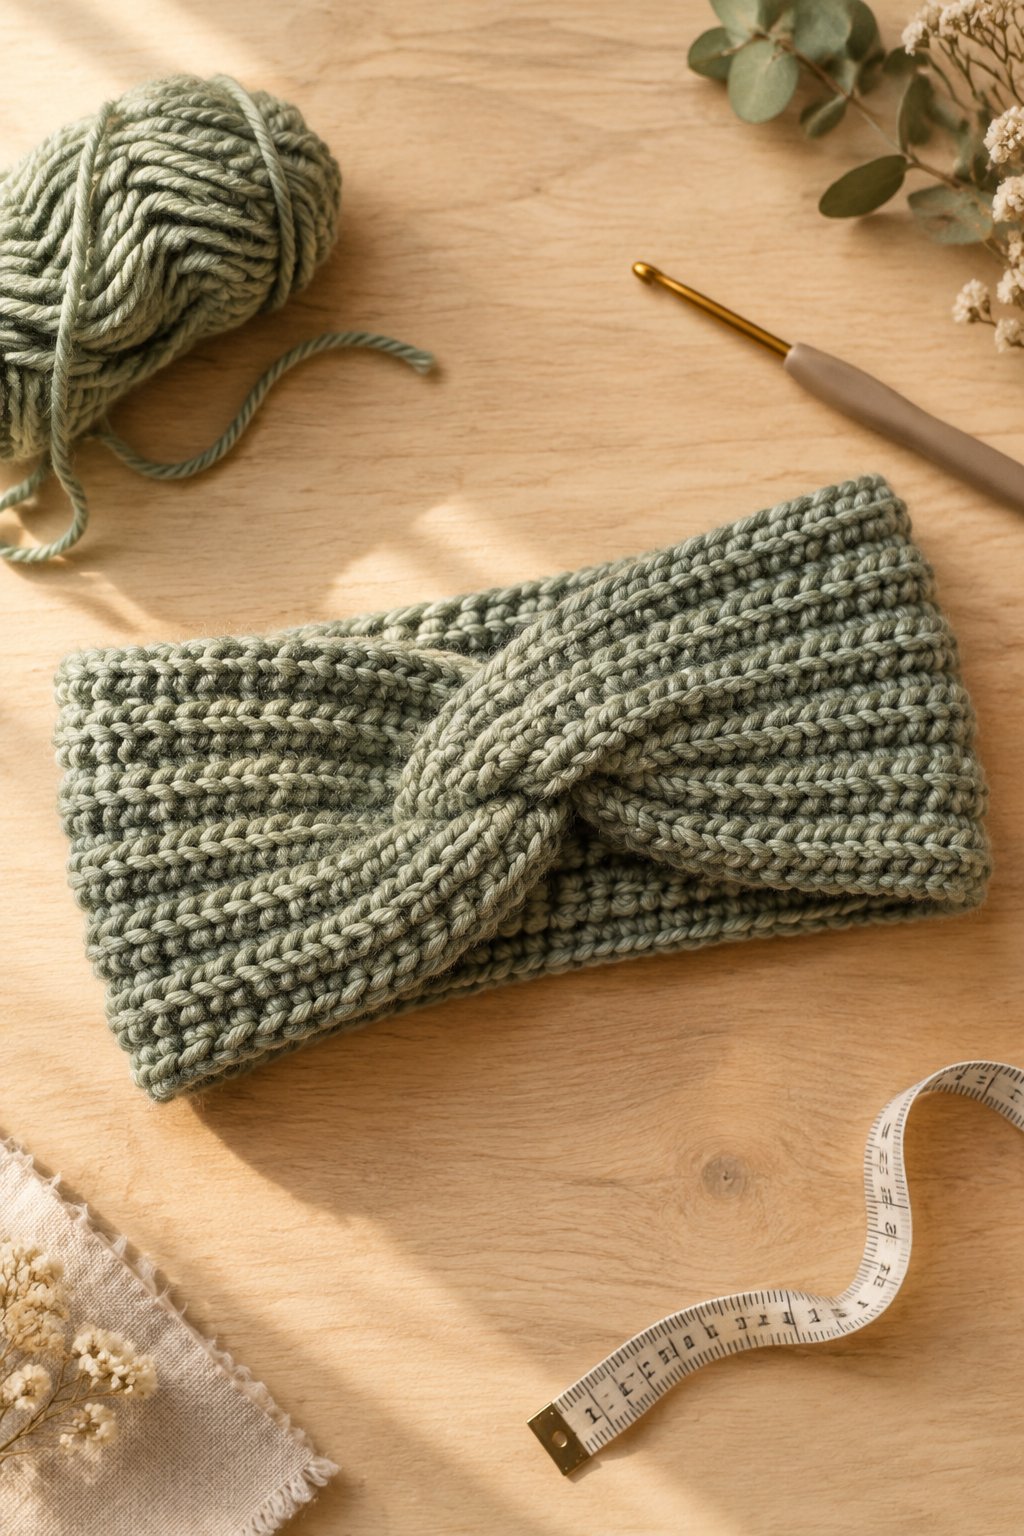
A twisted ear warmer turns a stretchy crochet rectangle into a polished cold-weather accessory. You’ll get a gathered front detail that looks especially clean in heathered wool or two wide blocks of muted color.
Choose worsted wool or a soft wool blend with a 5–5.5 mm hook. Back-loop half double crochet creates raised ribs without complicated stitch work. Make your rectangle about 4–5 inches wide, checking the length around your head as you work.
Follow a folded-end twist seam, sewing through every layer before turning the seam inward. This easy project needs enough stretch for a snug fit, so test your fabric before joining. Position the twist above your forehead and keep the seam flat to avoid a bulky spot beneath your hair.
|
Detail |
Specification |
|---|---|
|
Yarn Weight |
Worsted, #4 |
|
Skill Level |
Easy |
|
Estimated Time |
2–4 hours |
9) Chunky Catchall Basket

Holding compatible scraps together gives your catchall basket a thick, speckled surface. Combine a neutral strand with changing accent colors for a rounded basket that feels coordinated even when your leftovers vary.
Use bulky yarn or several strands that produce a similar thickness, starting with a 6–8 mm hook. Work a flat single crochet base, then build the walls without increases. A back-loop round at the base creates a defined bend where the sides begin.
Aim for a small basket around 5–6 inches across while you learn how firmly to crochet. You’ll need easy-level skills and steady tension to help the walls stand. Finish with a firm slip-stitch edge, and use your basket for lightweight notions or wrapped treats. Keep handles short if you add them.
|
Detail |
Specification |
|---|---|
|
Yarn Weight |
Bulky, #5 equivalent |
|
Skill Level |
Easy |
|
Estimated Time |
2–4 hours |
10) Patchwork Granny Square Tote Bag

You turn a larger collection of leftovers into a useful tote by joining matching-size granny squares. Use colorful centers with a shared navy or cream final round to give your patchwork a clear frame.
Choose worsted cotton and a 4–5 mm hook for sturdy squares. Double crochet clusters keep the motifs familiar, while single crochet joins add visible ridges between panels. Lay out your squares before joining so you can spread repeated colors across both sides.
This intermediate project includes assembly and handle placement. Add tightly stitched straps, securing them across several rows to distribute the load. A fabric lining helps contain small belongings and supports the crocheted shell. Use your finished tote for light errands or a portable yarn project, and check the handles for stretching after its first outing.
|
Detail |
Specification |
|---|---|
|
Yarn Weight |
Worsted, #4 cotton |
|
Skill Level |
Intermediate |
|
Estimated Time |
8–15 hours |
11) Color-Block Crochet Beanie

Broad color bands give your leftover yarn a clean, modern look in a fitted crochet beanie. Try charcoal at the brim with rust above it, or place your brightest shade near the crown for a small statement.
Use worsted acrylic or washable wool with a 5–5.5 mm hook. Choose a size-specific pattern worked in half double crochet, adding a ribbed brim for stretch. Keep the yarn weight consistent so each color block has a similar thickness.
You’ll need easy-level skills for shaping and checking fit. Measure the intended wearer’s head and follow the pattern’s gauge before starting the full hat. If you add a pom-pom, make it removable for washing. Save a small amount of brim yarn for a matching top detail that ties your colors together.
|
Detail |
Specification |
|---|---|
|
Yarn Weight |
Worsted, #4 |
|
Skill Level |
Easy |
|
Estimated Time |
3–6 hours |
12) Striped Fingerless Gloves

Striped fingerless gloves keep your palms warm while leaving your fingertips free. Narrow teal and gray bands create a tidy everyday pair, while uneven stripes give you more freedom to use partial balls.
Select soft DK yarn with a 3.5–4 mm hook. A beginner-friendly construction uses two matching rectangles worked in half double crochet, then seamed with openings for your thumbs. Add back-loop ribbing at the wrists if you want a closer fit.
Divide your available colors into two equal groups before starting so your second glove gets the same stripe options. Try on the first rectangle before sewing, checking that it wraps comfortably around your hand. Keep the thumb opening loose enough for movement. You’ll have an easy accessory for reading outdoors or working at a chilly desk.
|
Detail |
Specification |
|---|---|
|
Yarn Weight |
DK, #3 |
|
Skill Level |
Easy |
|
Estimated Time |
3–5 hours per pair |
13) Crochet Flower Garland

A flower garland gives your shortest colorful scraps a decorative role along a shelf or wall. Repeat one simple flower shape in sunny shades, or use a muted palette for a softer year-round display.
Choose DK cotton with a 3.5–4 mm hook for petals that hold their shape. Work small flowers with chain loops and double crochet petals, keeping the centers consistent across your set. Lightly block each motif according to its fiber care instructions before joining.
Arrange your finished flowers at even intervals along a crochet chain, securing each at two points to reduce twisting. This easy project lets you add motifs whenever another scrap becomes available. Leave generous hanging loops at both ends, and position your garland away from cribs, young children, pets, and open flames.
|
Detail |
Specification |
|---|---|
|
Yarn Weight |
DK, #3 cotton |
|
Skill Level |
Easy |
|
Estimated Time |
2–4 hours for a short garland |
14) Mini Sweater Hanging Ornaments

You get plenty of charm from a tiny sweater ornament with contrasting cuffs and a striped body. Choose classic red and cream for seasonal decorating, or copy the colors of a favorite full-size sweater.
Use sport or DK yarn with a 3–3.5 mm hook to keep the details neat. Follow a miniature sweater pattern worked in single or half double crochet, with simple shaping for the sleeves. Reserve small scraps for the neckline and lower hem before starting the body.
This intermediate project suits you if you enjoy small seams and careful counting. Keep the sweater flat or add a trace of stuffing for gentle shape, then attach a secure hanging loop. Use your ornament as a gift topper, and embroider an initial on the front for a personal detail.
|
Detail |
Specification |
|---|---|
|
Yarn Weight |
Sport #2 or DK #3 |
|
Skill Level |
Intermediate |
|
Estimated Time |
1–3 hours each |
15) Moss Stitch Scrap Yarn Scarf

Moss stitch blends changing yarn colors into a scarf with small, woven-looking marks. Alternate lively scraps with a recurring neutral shade to soften the transitions, or arrange your leftovers from pale to dark.
Choose soft worsted yarn and a 5–6 mm hook for comfortable drape. You’ll repeat single crochet and chain-one spaces, working each new single crochet into a space from the previous row. Keep your turning chains consistent to maintain straight edges.
Start around 7 inches wide and choose a length that suits your available yarn. This beginner-friendly project gives you an easy place to practice relaxed tension. Check the fabric against your neck before committing to every scrap, since rough fibers feel stronger there. Add a narrow border only after checking that you have enough yarn.
|
Detail |
Specification |
|---|---|
|
Yarn Weight |
Worsted, #4 |
|
Skill Level |
Beginner |
|
Estimated Time |
6–12 hours |
16) Granny Stripe Baby Blanket

A granny stripe baby blanket gives your larger leftovers room to form cheerful bands of color. Soft mint and peach create a gentle palette, while a repeated cream stripe gives brighter shades a consistent rhythm.
Use smooth, machine-washable DK or worsted yarn with a 4–5.5 mm hook. Choose a granny stripe pattern with double crochet clusters and follow its foundation multiple. A roughly 30-by-36-inch blanket gives you a manageable target for supervised cuddle time.
This easy project still needs planning because a blanket uses much more yarn than small accessories. Set aside enough matching yarn for the border before you begin. Secure every end carefully and skip fringe or attached decorations. When gifting, include washing instructions and remind the caregiver to keep blankets out of an infant’s sleep space.
|
Detail |
Specification |
|---|---|
|
Yarn Weight |
DK #3 or worsted #4 |
|
Skill Level |
Easy |
|
Estimated Time |
15–30 hours |
17) Patchwork Cushion Cover

Your leftover squares become a coordinated cushion cover when you repeat their size and border color. Mix simple solid squares with granny motifs for a patchwork surface, keeping one shade in common with your room.
Use worsted yarn and a 4.5–5 mm hook, choosing fibers with compatible care needs. Single crochet joins create a raised grid that gives your design extra texture. For a 16-inch pillow insert, measure your assembled panels against the insert before completing the edges.
You’ll use intermediate skills for joining and fitting the cover. Make a removable envelope back with overlapping panels so you can take the insert out for washing. Check the overlap while the pillow is inside, since crochet stretches under pressure. Finish by reinforcing the opening corners with a few extra stitches.
|
Detail |
Specification |
|---|---|
|
Yarn Weight |
Worsted, #4 |
|
Skill Level |
Intermediate |
|
Estimated Time |
8–16 hours |
How to Match Leftover Yarn to a Project
Choose your project by the amount of usable yarn you have and the fabric your finished piece needs. A quick stash check helps you commit to a size before you spend time on detailed stitching.
How Much Yarn Do You Actually Have?
Weigh your leftovers on a kitchen scale and use the original label to estimate yardage. Divide the remaining grams by the label’s full-skein grams, then multiply by its listed yards. For example, 25 grams from a 100-gram, 200-yard skein gives you about 50 yards.
If you have no label, make one sample motif and weigh it. Use that weight to estimate how many matching motifs your remaining yarn will support, leaving some yarn for joining and finishing.
Which Projects Suit Cotton, Wool, or Acrylic?
Choose cotton for absorbent projects such as dishcloths and coasters. Its clear stitch definition also suits small pouches, although its weight and limited stretch affect larger accessories.
Use wool for warm, springy pieces such as ear warmers, following the label’s washing directions. Acrylic gives you lightweight color options for scarves and blankets. For anything worn close to your skin, rub a swatch against your wrist before choosing the full project.
Can You Combine Different Yarn Weights?
Combine different weights when your swatch produces an even fabric suited to the project. Holding two thinner strands together is a useful starting point, though their combined thickness varies with the yarn’s construction.
Compare the stitches beside your thicker yarn before committing. For patchwork, adjust individual motif rounds until the finished squares match in size. Keep major thickness changes out of close-fitting projects unless your pattern accounts for them.
How Do You Choose a Hook Size?
Start with the pattern’s suggested hook, then adjust after making a swatch in your chosen yarn. Your goal is the required gauge and a fabric that suits the item.
Use a smaller hook when you need firm amigurumi stitches or supportive basket walls. Try a larger hook when a scarf feels stiff. Change one hook size at a time, and check both the stitch count and the feel of the washed sample.
How to Make Mixed Scraps Look Intentional
Give your scraps one repeated design rule, such as a shared border color or consistent stripe width. That repeated detail helps your finished project look planned while leaving room for varied leftovers.
How Can a Limited Color Palette Unify Your Scraps?
Choose a small palette before you start, using one main neutral with a few accent shades. Lay the yarn side by side in daylight so you can judge how the colors work together.
If you have many unrelated shades, group them by warmth or brightness. Use the same neutral around every patchwork square, or repeat it between colorful scarf sections. Save any shade that clashes with your chosen group for a separate small project.
When Should You Change Colors?
Change colors at clear design boundaries, including the end of a row or a completed motif round. For a clean transition in basic stitches, draw the new color through the final pull-through of the previous stitch.
Plan stripe widths around your shortest usable color. If you want matching gloves, divide each color before beginning either piece. For an intentionally uneven scarf, repeat a narrow neutral stripe between changing blocks to keep the arrangement consistent.
How Can You Secure Joins and Weave In Ends?
Leave tails around 6 inches long and weave them through the backs of nearby stitches with a yarn needle. Change direction during weaving, taking care to preserve the fabric’s stretch.
For slippery yarn, use longer tails and extra direction changes. Work each tail into an area of matching color when possible. After washing your sample, gently stretch it and inspect the join before using the same method throughout a blanket or bag.
Why Should You Check Gauge and Care Instructions?
Check gauge and care instructions so your mixed yarns keep a compatible size and texture after washing. Different fibers react differently to water, heat, and handling, even when their labels list the same yarn weight.
Make a swatch containing every yarn you plan to combine, then wash it using the gentlest required care method. Measure it again after drying. Keep the yarn labels or write a care tag, and attach those instructions when you give away the finished piece.