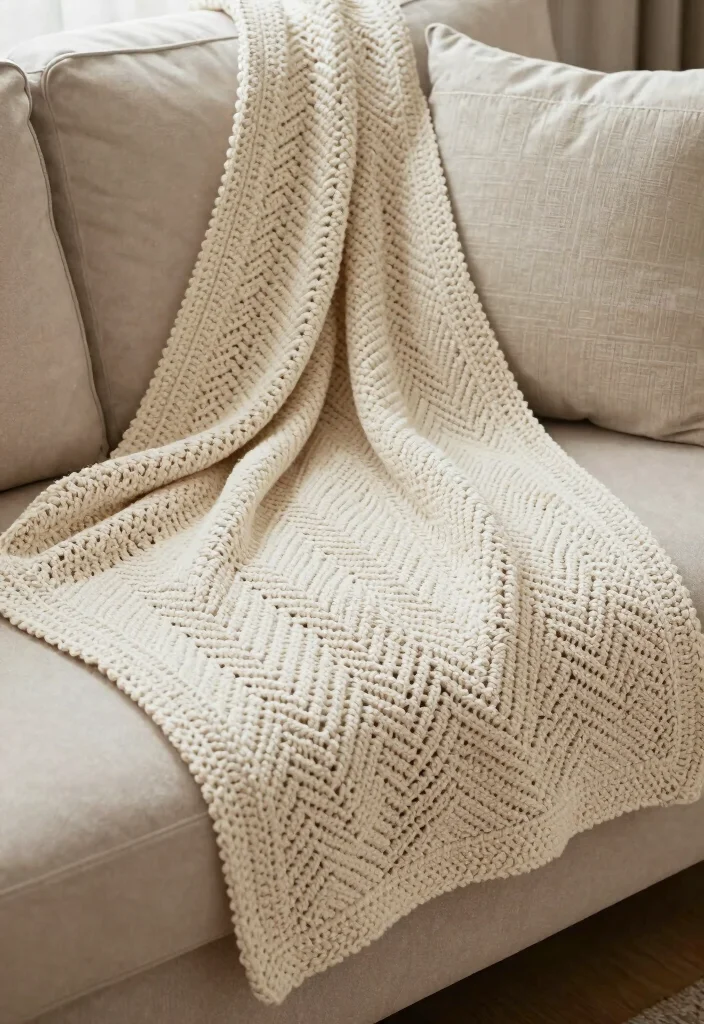
Creating beautiful blankets is a delightful way to express your creativity and keep warm at the same time. Yet, many crafters often find themselves stuck when it comes to finishing those lovely projects. That’s why I’ve put together this crochet borders for blankets guide! It’s all about adding that polished touch with some stunning decorative edging ideas that can elevate your handmade creations.
If you’re a DIY enthusiast or someone who loves crafting with yarn, this post is for you. You care about the details and want your blankets to not only be functional but also visually appealing. Whether you’re a beginner or have some experience under your belt, adding beautiful crochet edging techniques can make all the difference in your finished piece.
In this guide, you’ll discover 18 unique edging ideas that promise to enhance your blankets’ appearance. From the classic shell stitch edge to the twisted lace edge, there’s something for every style and skill level. Each technique comes with clear instructions to help you achieve those polished crochet finishes you’ve been dreaming about.
So grab your favorite yarn and hook, and let’s dive into the world of decorative blanket borders. You’ll be amazed at how a simple border can transform your work into a stunning masterpiece that you’ll be proud to show off!
Key Takeaways
– You’ll learn 18 creative crochet edging techniques that can enhance the appearance of your blankets.
– Each edging idea comes with straightforward instructions, making it easy for crafters of all levels to follow.
– Techniques include various styles like the bobble stitch edge and the ruffled edge, catering to a range of tastes.
– Finishing your blanket with a decorative border adds a polished look that can impress anyone who sees your work.
– This guide provides not just ideas but also practical tips for implementation, ensuring you can put your newfound knowledge to use right away.
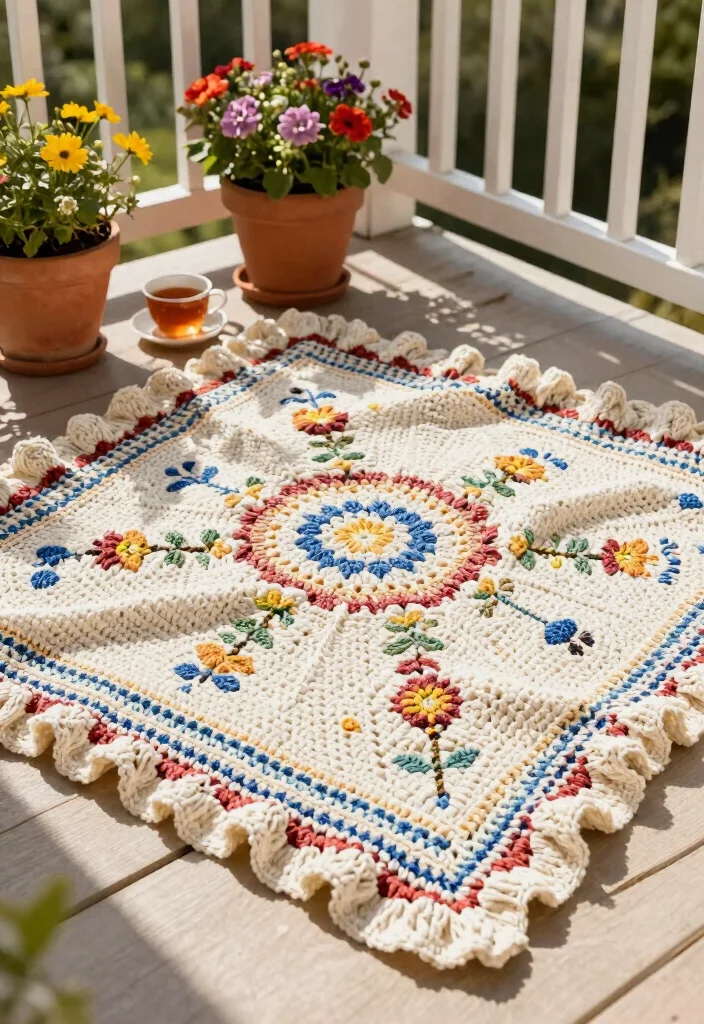
1. Classic Shell Stitch Edge
Looking for a way to elevate your blanket? The classic shell stitch edge brings a timeless elegance that’s hard to resist. This charming pattern features clusters of stitches that create a beautiful wave effect, making it perfect for everything from cozy baby blankets to large throws. Best of all, it’s easy to learn and implement, even for beginners!
Start by choosing a contrasting yarn color to make the shells really stand out. Ensure your clusters are evenly spaced for a neat finish. This simple technique can dramatically enhance your blanket’s appeal.
Key steps to create the shell stitch edge:
– Start with a slip knot and chain the length of your blanket.
– Work 5 double crochets in the same stitch for the shells.
– Skip two stitches and repeat the pattern until the end.
– Finish with a slip stitch and weave in any ends.
Your blankets will shine with this polished finish, making them look professionally crafted!
2. Picot Edge
Do you want to add a touch of whimsy to your blankets? The picot edge is an enchanting choice that features playful bobble-like stitches. This delicate finish is perfect for lightweight blankets, lending a unique flair without adding bulk. It’s a delightful way to bring your crochet project to life!
Opt for a lighter weight yarn for an airy look, and consider pairing it with other stitches for added texture. The picot edge is versatile and can add charm to various styles of blankets.
Steps to craft the picot edge:
– Start with a chain stitch along the blanket edge.
– For each picot, chain 3, then slip stitch into the first chain.
– Repeat this around the edge, keeping the spacing even.
– End with a slip stitch and cut your yarn.
Your final product will have a fanciful touch that makes it a joy to behold!
3. Simple Fringe Trim
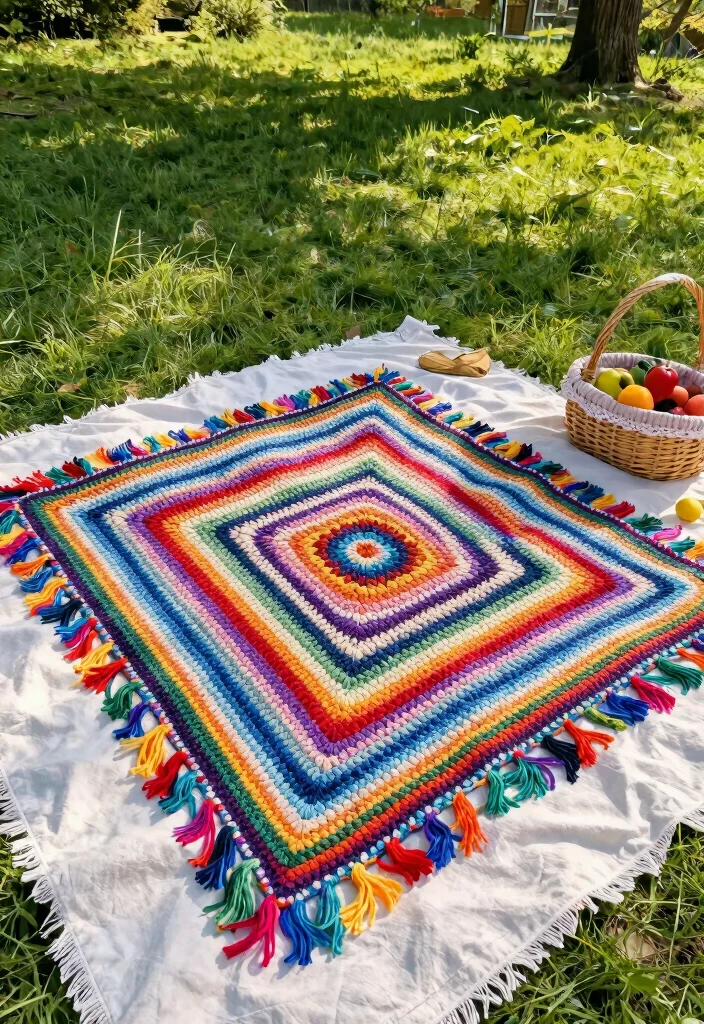
Want to give your blanket a cozy, laid-back vibe? Adding fringe is a fantastic option! This technique involves attaching long strands of yarn along the edges, which can be adjusted to your preferred fullness. It’s a simple and effective way to enhance the overall look of your blankets with a bohemian flair.
Mix different yarn colors for a unique fringe effect, and don’t hesitate to trim them to your desired length for a polished finish. This technique is perfect for gifts or personal projects alike.
How to create fringe trim:
– Cut strands of yarn in equal lengths.
– Attach the strands to the blanket edge using a knot.
– Ensure even spacing for a tidy appearance.
– Trim fringes to your liking.
Your blankets will radiate a fun and informal charm, making them perfect for any casual setting!
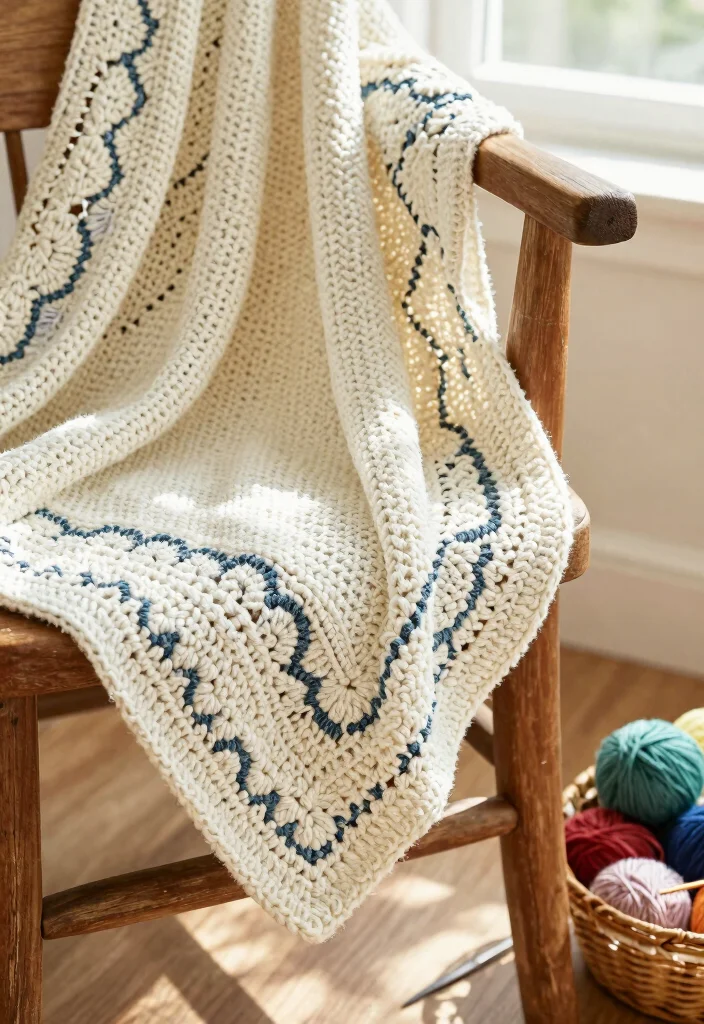
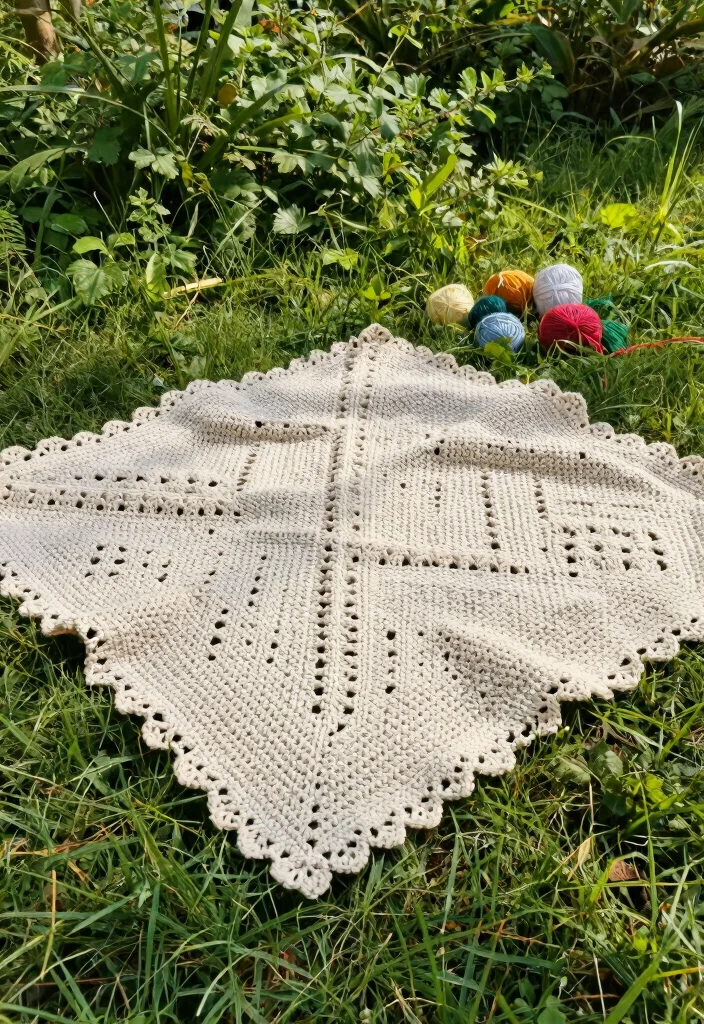
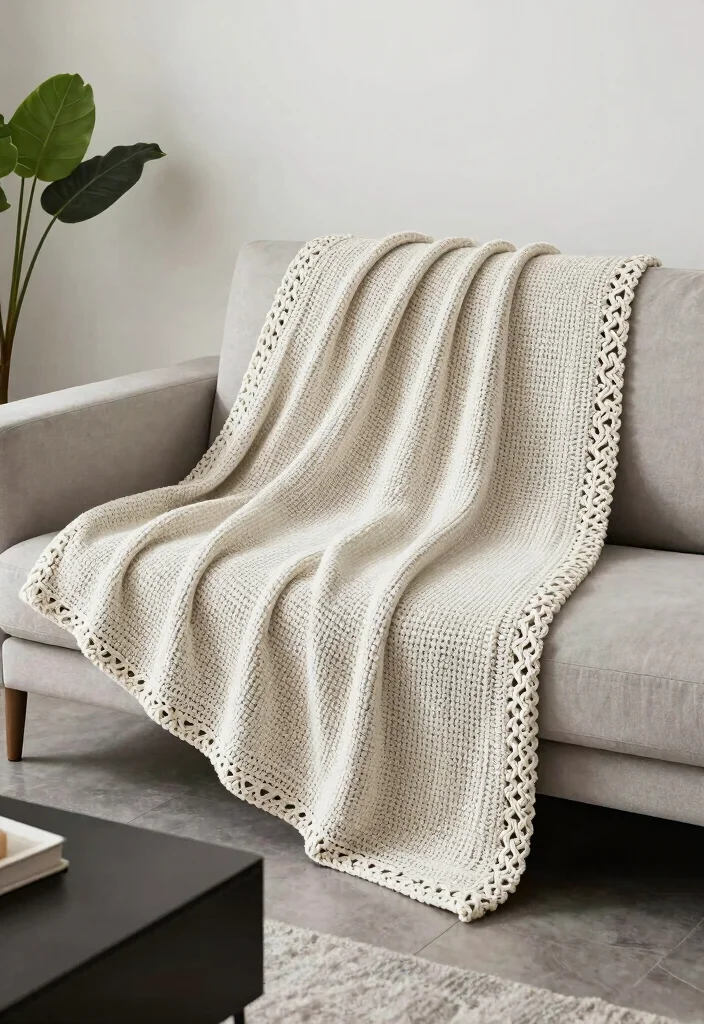
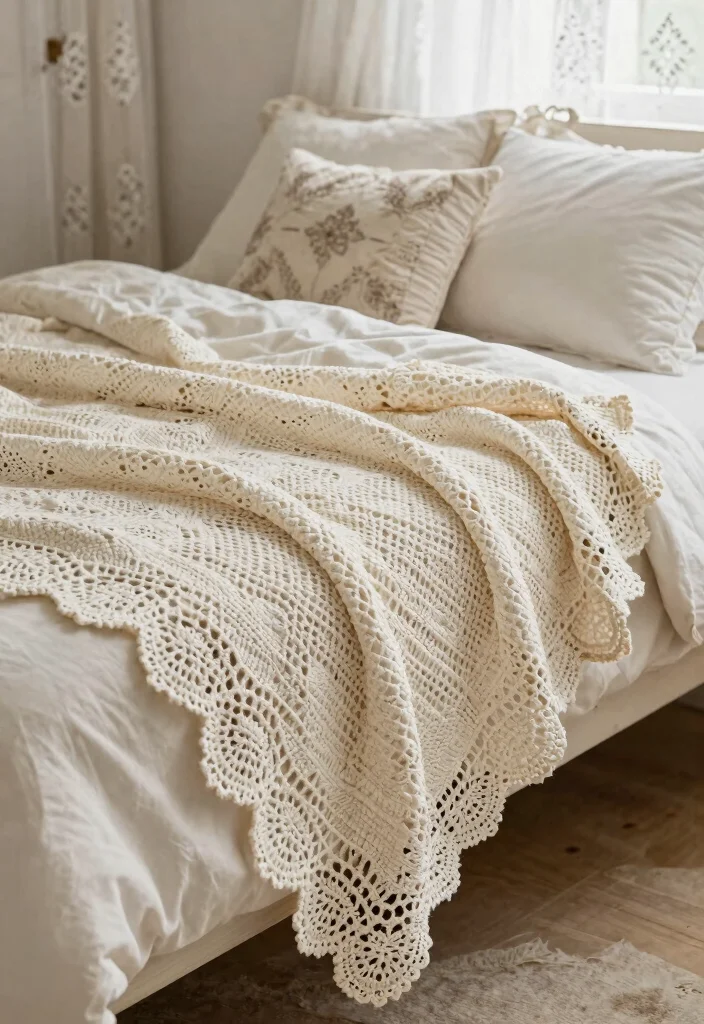
4. Lace Edging
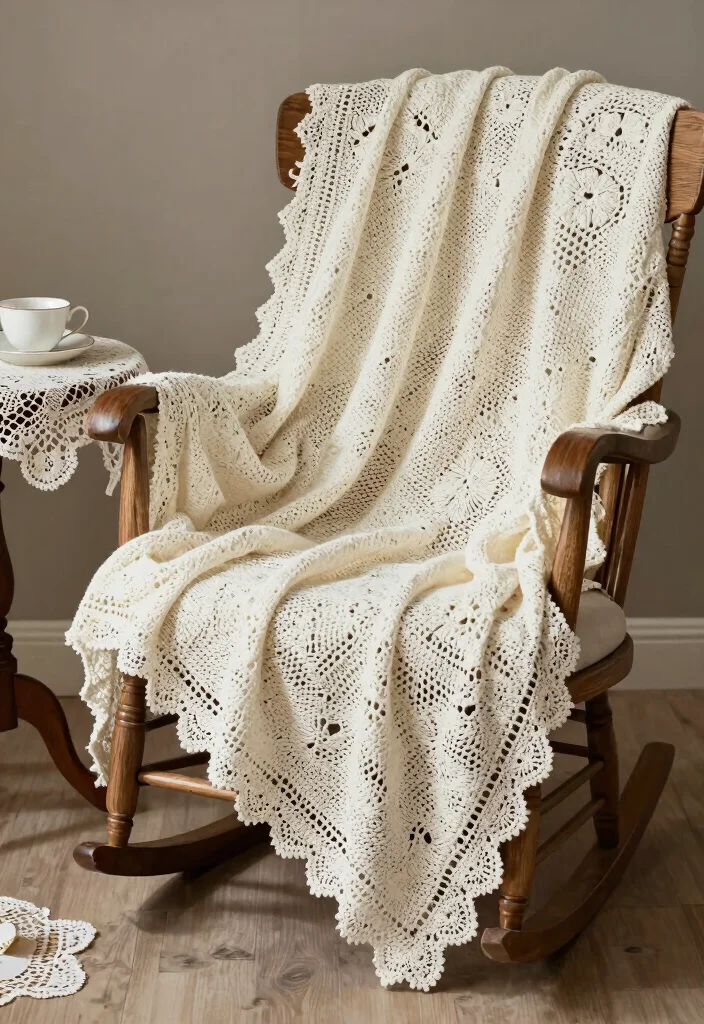
Looking to add a touch of sophistication to your crochet blankets? Lace edging is the way to go! This technique involves intricate stitch patterns that form a delicate lace-like appearance, making it ideal for special occasions. Perfect for wedding gifts or luxurious throws, lace edging transforms your creations into cherished pieces.
Use a fine yarn to enhance the lace effect and practice the stitch pattern separately to build your confidence. This way, you can achieve a polished look on your blanket.
Steps to create lace edging:
– Attach yarn at the blanket edge.
– Work through chains and double crochets to create lace patterns.
– Repeat until the edge is fully covered.
– Weave in any ends for a neat finish.
This stunning edge is sure to impress anyone who receives your beautiful creation!
5. Twisted Rope Edge
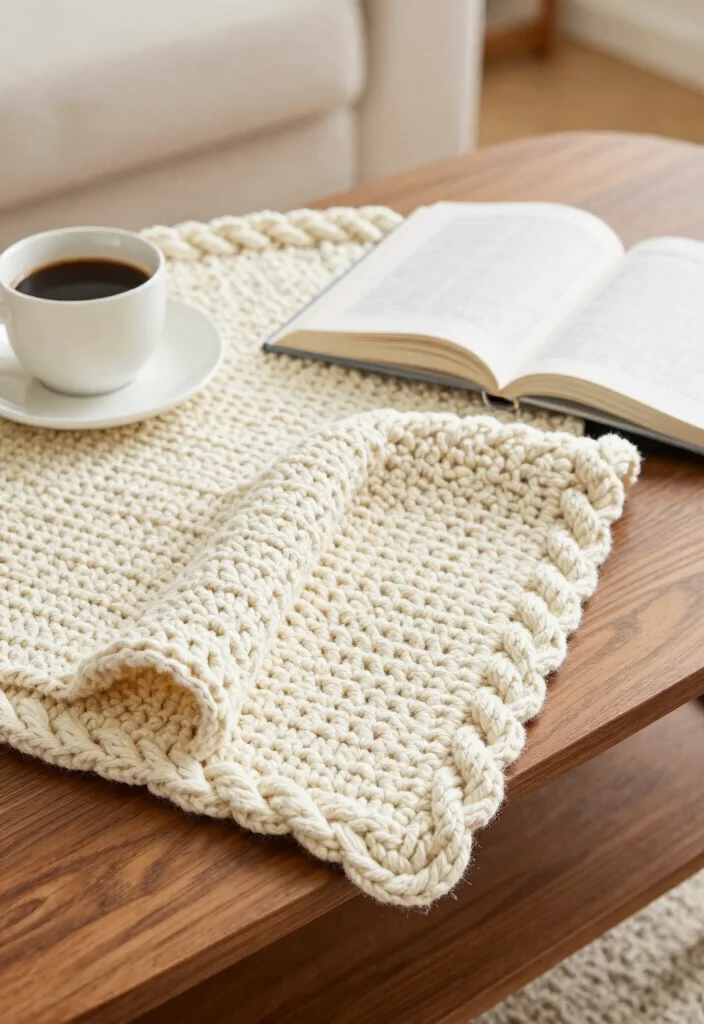
Want something unique for your crochet blanket? The twisted rope edge offers a fun twist on traditional borders! This spiral-like finish adds depth and character, making it perfect for rustic or nautical-themed projects. It’s an eye-catching way to finish off your blankets beautifully.
Consider using a thicker yarn for a more pronounced twist and balance this border with solid colors to showcase its design. This technique is both stylish and functional.
Steps to create a twisted rope edge:
– Chain a long length along the edge.
– Work single crochets, twisting the yarn as you go.
– Continue until you reach the end of your blanket.
– Fasten off and weave in any ends.
Your blanket will make a bold statement, standing out from the rest!
6. Scallop Edge
If you want to add a soft, wave-like finish to your blanket, the scallop edge is a great choice! This popular technique delivers a visually delightful border that can complement many blanket styles. From whimsical to classic, the scallop edge is incredibly versatile and charming.
Use contrasting colors for a bolder look, and practice the stitch sequence beforehand to ensure consistency. It’s an easy way to enhance your project’s appeal.
Steps to create a scallop edge:
– Create a foundation chain along the edge.
– Work a series of stitches to form scallops (typically, 5 double crochets in one stitch).
– Skip a couple of stitches and repeat until you reach the end.
– Slip stitch to finish and weave in the ends.
This scallop edge brings a nostalgic charm to your crochet project, making it a delightful addition!
7. Bobble Stitch Edge

Do you love textures? The bobble stitch edge is a perfect way to add a fun, three-dimensional finish to your blankets. This technique creates little bumps along the border, making it ideal for cozy blankets and playful decor. It offers both visual and tactile interest!
Experiment with different colors to make your bobbles stand out, and ensure even spacing for a neat look. This edge is sure to make your blankets pop.
Steps to create a bobble stitch edge:
– Attach yarn at the edge with a chain stitch.
– Create bobbles by working 5 double crochets in one stitch and pulling the last loop through.
– Repeat until you reach the end.
– Finish with a slip stitch and weave in the ends.
Add this charming edge to your blanket to give it extra character!
8. Chain Link Edge
Looking for a sleek and modern finish for your blanket? The chain link edge is a fantastic option! This technique creates a clean line that enhances the overall look without overwhelming the design. It’s simple yet elegant, perfect for minimalist aesthetics.
Choose a smooth, shiny yarn for a refined appearance and ensure uniform spacing between the links for a polished finish. This style is straightforward and suitable for beginners.
Steps to create a chain link edge:
– Attach yarn to the blanket edge.
– Chain a series of stitches, linking them together.
– Keep the links evenly spaced.
– Secure with a slip stitch and finish off.
The chain link edge provides a sophisticated touch, making your blanket feel truly stylish!
9. Cross-Stitch Edge
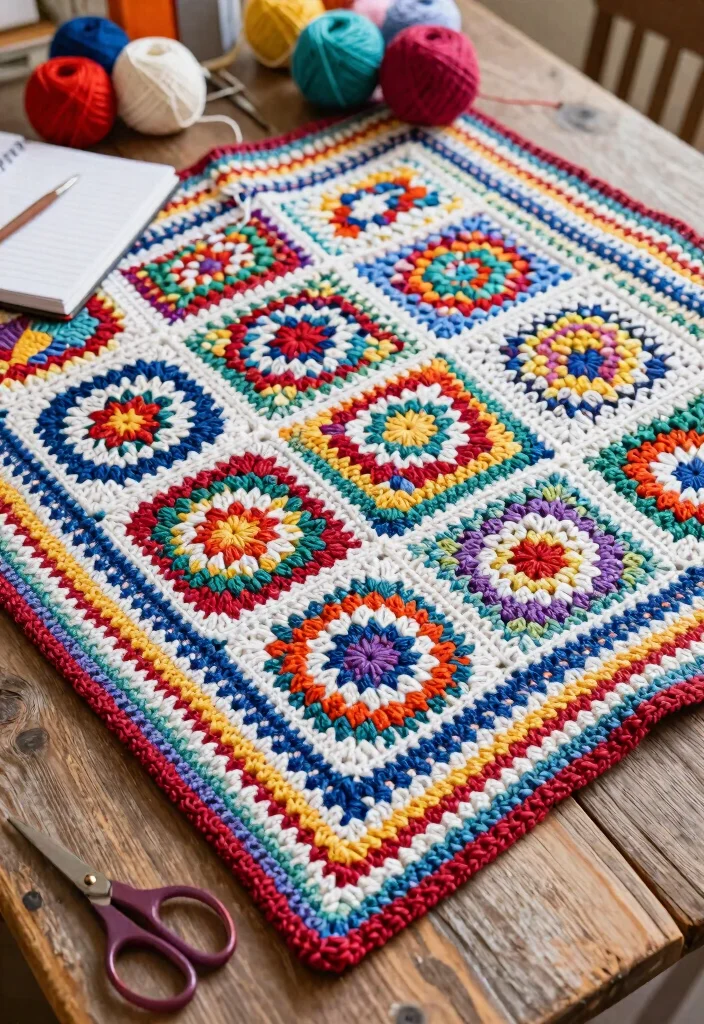
Ready to unleash your creativity? The cross-stitch edge allows you to add vibrant designs along the edge of your blanket, making it one-of-a-kind. Although it requires some patience, the result is beautiful detailing that personalizes your piece in a fun way!
Plan your design ahead of time to avoid mistakes and use contrasting yarn colors to make your pattern pop. This technique is perfect for adding a unique flair.
Steps to create a cross-stitch edge:
– Attach yarn to the blanket edge.
– Create a series of cross stitches in your chosen pattern.
– Keep the stitches evenly spaced for a cohesive look.
– Secure your work by weaving in the ends.
Injecting creativity with a cross-stitch edge can make your blanket personal and engaging!
10. Ruffled Edge
Want to add a playful flair to your blankets? The ruffled edge is a charming finish that creates soft, cascading waves. It brings movement and life to any piece, making it especially popular for baby blankets and festive throws.
Use a lighter yarn for a delicate ruffle and ensure your ruffles are evenly spaced for a neat finish. This technique is delightful for any light and airy blanket.
Steps to create a ruffled edge:
– Begin with a foundation chain along the edge.
– Create ruffles by chaining stitches and working double crochets into the same stitch.
– Space your ruffles evenly until the edge is complete.
– Secure with a slip stitch.
This delightful edge adds a joyful element to your crochet creations!
11. Tasseled Edge
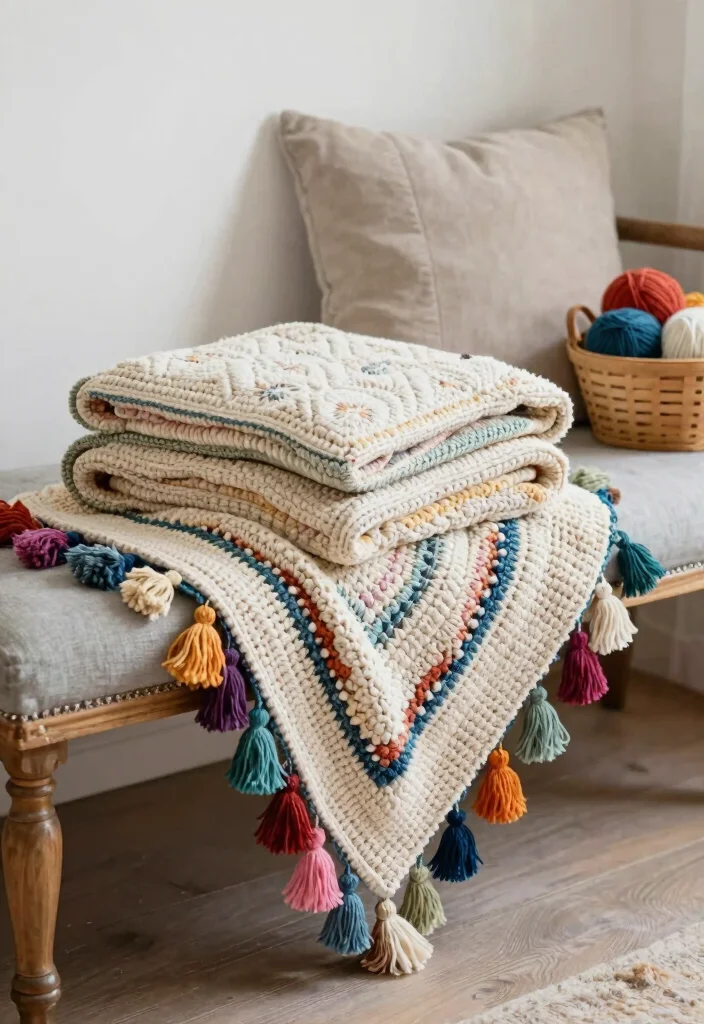
Want to elevate your blankets with a trendy touch? A tasseled edge adds flair and personality to your crochet project. Tasseled edges not only look decorative but also offer a fun tactile element that suits various styles, from bohemian to classic.
Create tassels in different colors for an eclectic look, and ensure they are securely attached to avoid snagging. This technique adds a unique touch to any blanket.
Steps to create a tasseled edge:
– Cut strands of yarn for the tassels in equal lengths.
– Attach the tassels to the corners or along the edge.
– Knot securely and trim to your desired length.
– Fluff the tassels for a fuller appearance.
Tasseled edges infuse your blankets with a playful spirit that stands out!
12. Ribbed Edge

Looking for a modern look for your crochet blankets? The ribbed edge offers a structured appearance that contrasts beautifully with softer patterns. This technique alternates between slip stitches and single crochets, creating a subtle texture that’s both chic and functional.
Using thicker yarn enhances the ribbing, giving your blanket a sturdy finish. Make sure to maintain even tension for a consistent look.
Steps to create a ribbed edge:
– Attach yarn at the edge.
– Alternate between slip stitches and single crochets to create the rib pattern.
– Repeat until you reach the end.
– Fasten off and weave in ends.
This edging technique adds a polished touch to your crochet projects!
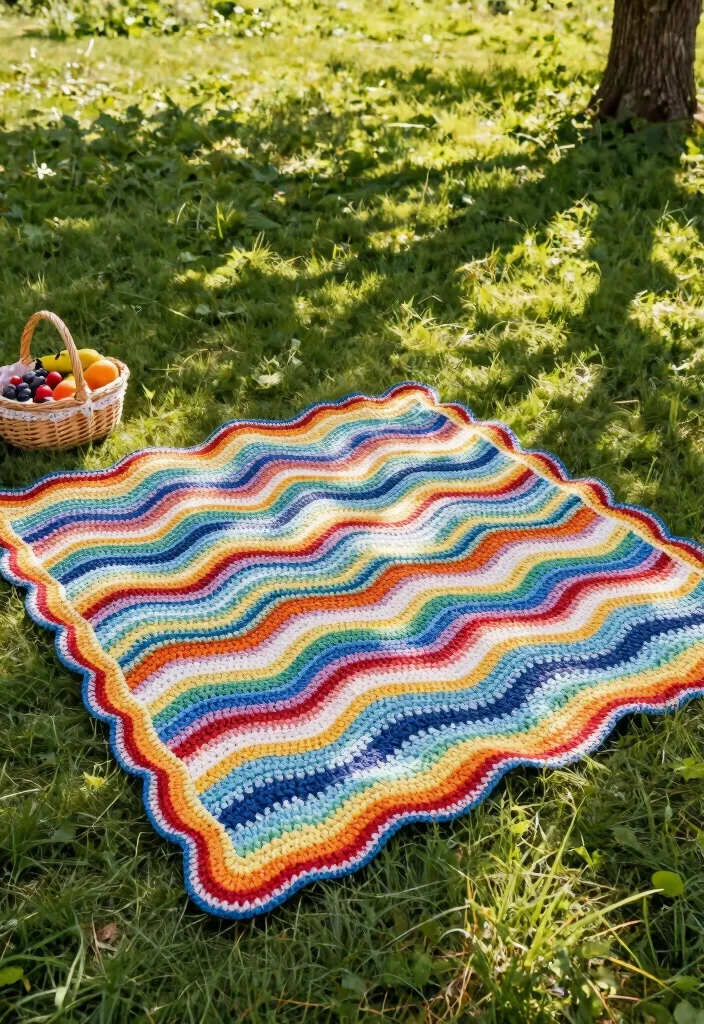
13. Wave Edge
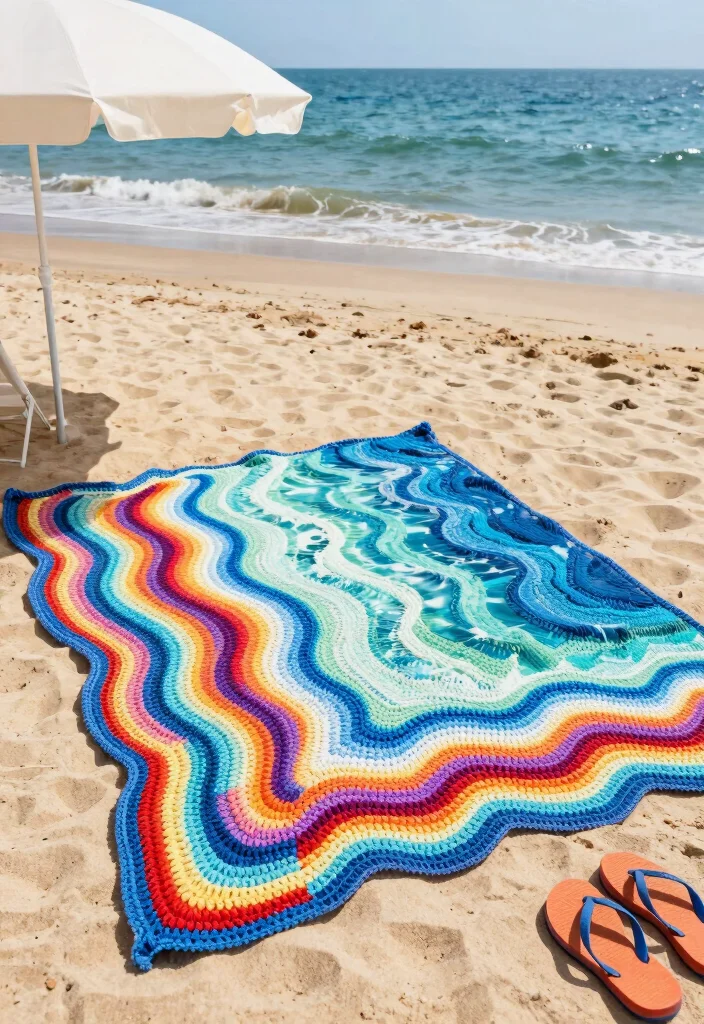
Add a dynamic touch to your blanket with a wave edge! This technique mimics ocean waves, creating a rhythmic and beautiful border. The wave edge is eye-catching and fun, perfect for beach-themed or nautical designs.
Choose a soft, flowing yarn to enhance the wave effect, and practice the stitch sequence for consistent waves. This playful edge is sure to delight!
Steps to create a wave edge:
– Begin with a foundation chain.
– Create waves by working clusters of stitches that form peaks and valleys.
– Repeat the wave pattern around the edge.
– Finish with a slip stitch and tuck in loose ends.
This cheerful edge adds light-heartedness to your crochet piece!
14. Appliquéd Edge
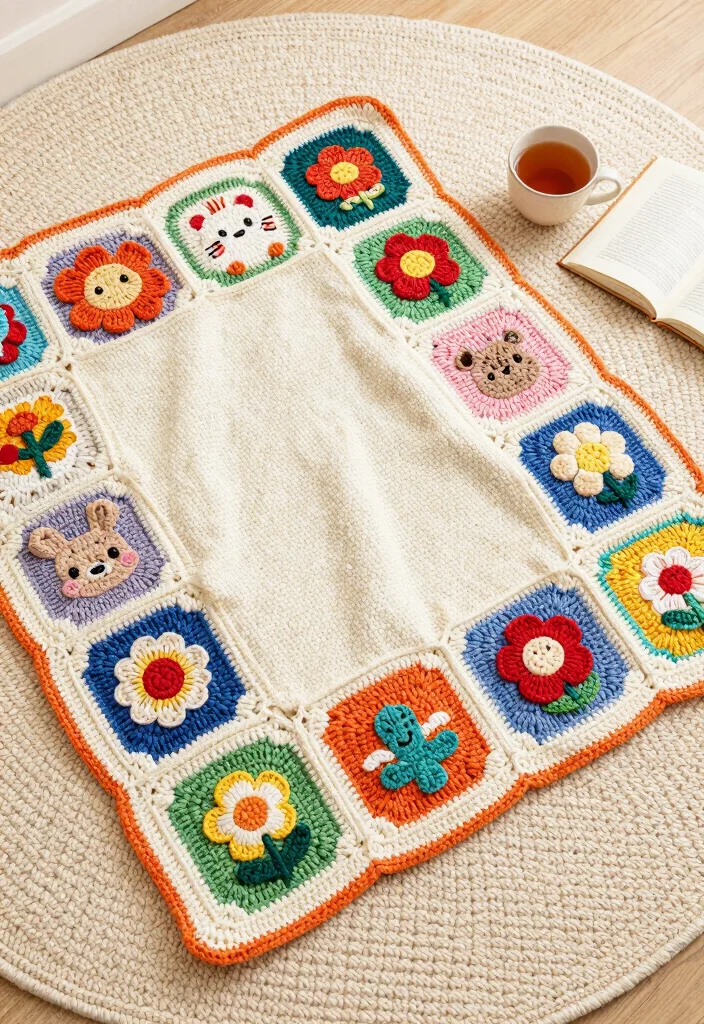
Want to make your blanket truly unique? Appliquéd edges allow you to sew or crochet small shapes onto the edges, incorporating personal symbols or cute designs. This method lets you showcase your creativity while adding texture and interest to the blanket edge.
Plan your design on paper before starting to avoid mistakes and use contrasting colors to make the appliqués stand out. This technique is perfect for gifts and personal keepsakes.
Steps to create an appliquéd edge:
– Create your appliqué shapes separately.
– Securely attach them to the edges with slip stitches or sewing.
– Ensure even distribution for a balanced look.
– Weave in any loose ends.
Appliqués make your blanket a cherished keepsake, perfect for years to come!
15. Herringbone Edge
Looking for a stylish crochet border? The herringbone edge gives a unique twist to standard edges. This technique creates a zigzag pattern that adds stunning contrast against simpler designs, making it suitable for both traditional and modern blankets.
Maintain even tension for a polished look and consider experimenting with color changes for added visual interest. This edge provides a sophisticated flair to your blankets.
Steps to create a herringbone edge:
– Attach yarn at the corner of the blanket.
– Create a herringbone pattern by alternating stitches.
– Repeat until you reach the end.
– Finish with a slip stitch and cut the yarn.
This edge elevates your crochet blanket, making it a standout piece!
16. Pom-Pom Edge
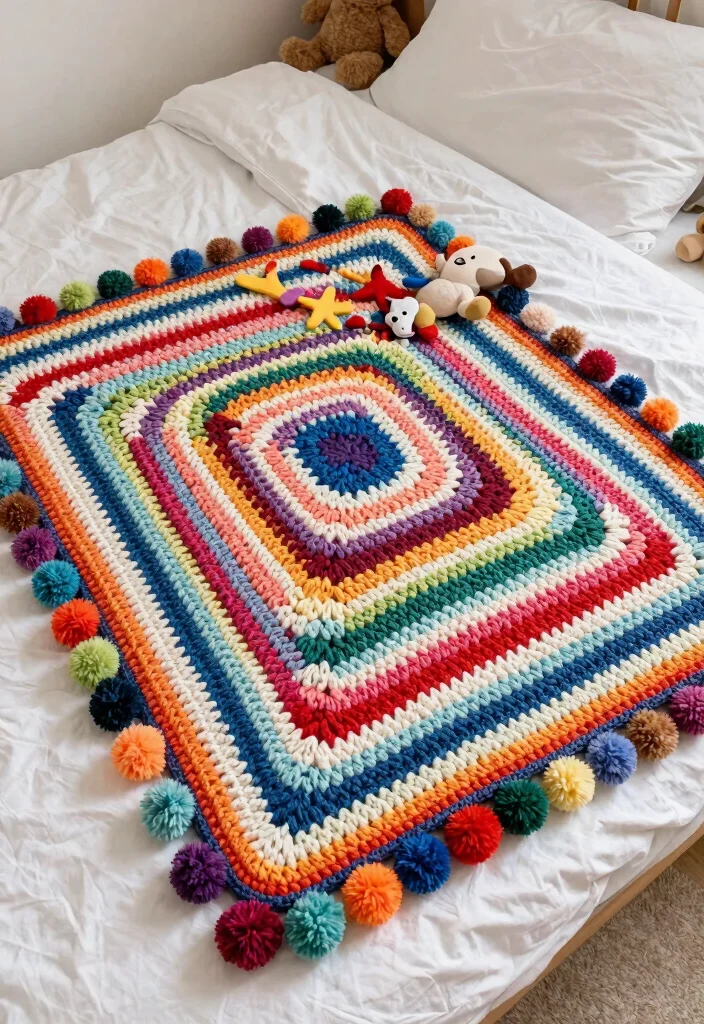
Want to add a fun twist to your blanket? The pom-pom edge is a playful addition that brings joy to your crochet projects. Perfect for kids’ rooms or whimsical decor, pom-poms can be created in various colors, allowing you to mix and match for a unique style!
Create pom-poms in different sizes for added dynamism, and ensure they’re securely attached for durability. This charming technique adds a lively touch to your blankets.
Steps to create a pom-pom edge:
– Make small pom-poms using a maker or by hand.
– Attach them to the blanket edge with a knot or stitch.
– Space them evenly for a balanced appearance.
– Trim the pom-poms to your preferred fluffiness.
Your blanket will be both cozy and a delightful addition to any room with this fun edge!
17. Chevron Edge
Looking to add boldness to your crochet blankets? The chevron edge introduces a striking zigzag pattern that’s visually appealing. It’s a great choice for modern decor and pairs beautifully with solid-colored blankets for a dramatic effect.
Plan your color scheme for a cohesive look and maintain consistent stitch size for a polished finish. This technique is perfect for those wanting to make a statement.
Steps to create a chevron edge:
– Start with a foundation chain along the blanket edge.
– Work into a zigzag pattern with increases and decreases.
– Repeat until your desired length is achieved.
– Fasten off and tidy up loose ends.
This striking design will elevate your blanket’s style to new heights!
18. Twisted Lace Edge
Want a truly unique finish? The twisted lace edge combines delicate lace with a twist! This intricate yet sturdy border adds elegance and complexity to your blankets, perfect for showcasing your crochet skills with beautiful detailing.
Use contrasting colors to highlight the twisted effect, and keep your tension even to maintain the beauty of the lace. This edge is ideal for upscale decor or special gifts.
Steps to create a twisted lace edge:
– Begin by crocheting a lace border around your blanket.
– Twist the yarn in sections for the desired effect.
– Finish off by ensuring a neat edge.
– Weave in any loose ends.
This edge combines sophistication and creativity, resulting in a stunning finish!
Conclusion
Adding a decorative edge to your crochet blankets can truly transform them into standout pieces. With these 18 crochet edging techniques, you have countless opportunities to express your creativity and personalize your projects.
Whether you prefer whimsical, elegant, or modern designs, there’s a border style that will fit your vision perfectly. So gather your yarn and hooks, and start experimenting with these beautiful borders today!
Frequently Asked Questions
What crochet edging techniques create a polished finish for blankets?
Think of the border as the frame that makes your blanket shine. In the world of crochet edging techniques, polished finishes come from borders that balance with the fabric. Try a picot edge for a dainty touch, a classic shell border for timeless charm, or a tidy single crochet with an optional picot and a refined moss stitch border for texture without overwhelm. Always measure the blanket, adjust the border width, and join neatly to avoid ruffling. Finish with blocking to set the edge and achieve a true polished crochet finish.
Pro tip: test your chosen DIY crochet patterns on a swatch before applying to the whole blanket.
Which decorative blanket borders are beginner-friendly and quick to learn?
If you’re new to this, start with borders that repeat simple stitches. A shell border looks gorgeous and is forgiving for beginners, a single crochet with a picot offers a modern, minimalist vibe, and a basic crochet edge with alternating stitches provides gentle texture without complexity. These options fit well with DIY & Crafts projects and are perfect for crafting with yarn. Attach evenly around the edge and tweak corner shaping as needed. Practice on a swatch first, then apply to your blanket for a quick, satisfying finish.
How do I decide which border style matches my blanket’s texture and color?
Start by considering the blanket’s yarn weight, stitch pattern, and color story. A bold texture can overwhelm a delicate border, while a subtle stitch benefits from a defined edge. For decorative blanket borders, aim for a border width of about 1–2 inches and test with a small sample. If the blanket has tight stitches, choose a simple shell or picot border; if it’s airy, a firmer moss stitch or filet border can ground the look. This thoughtful pairing delivers a cohesive, polished crochet finish in your DIY crochet patterns repertoire.
Can I combine multiple borders or add inner and outer borders?
Yes—layering borders can create stunning effects when done thoughtfully. Start with an inner border that hugs the blanket’s edge, then add an outer decorative border for drama. Ensure each border’s stitch count translates cleanly around corners to avoid pulling. A practical approach is to use a stable inner border (like single crochet) and reserve the outer border for a more decorative edge (such as a scallop or cluster). This yields a beautifully balanced, polished crochet finish you’ll love in your DIY & Crafts projects.
What supplies and measurements do I need to plan a border for a blanket?
Gather your essentials: a crochet hook that matches your yarn, extra yarn in the same weight, scissors, a tapestry needle, and a measuring tape. Start by measuring the blanket’s length and width, then decide how wide you want the border (1–2 inches is common). Calculate the number of stitches for the base row around the edge and how many repeats your chosen pattern requires. It helps to make a quick swatch to verify gauge and ensure a smooth repeat around corners. With these steps, you’ll have a reliable plan for beautiful decorative blanket borders and a confident, DIY crochet patterns journey.