For your first quick crochet win, choose a small, flat project with repeated stitches and minimal finishing. With these 17+ easy crochet ideas for Beginners Wanting Fast, Cute Wins, you’ll find cozy textures and playful details worth saving to your next DIY board.
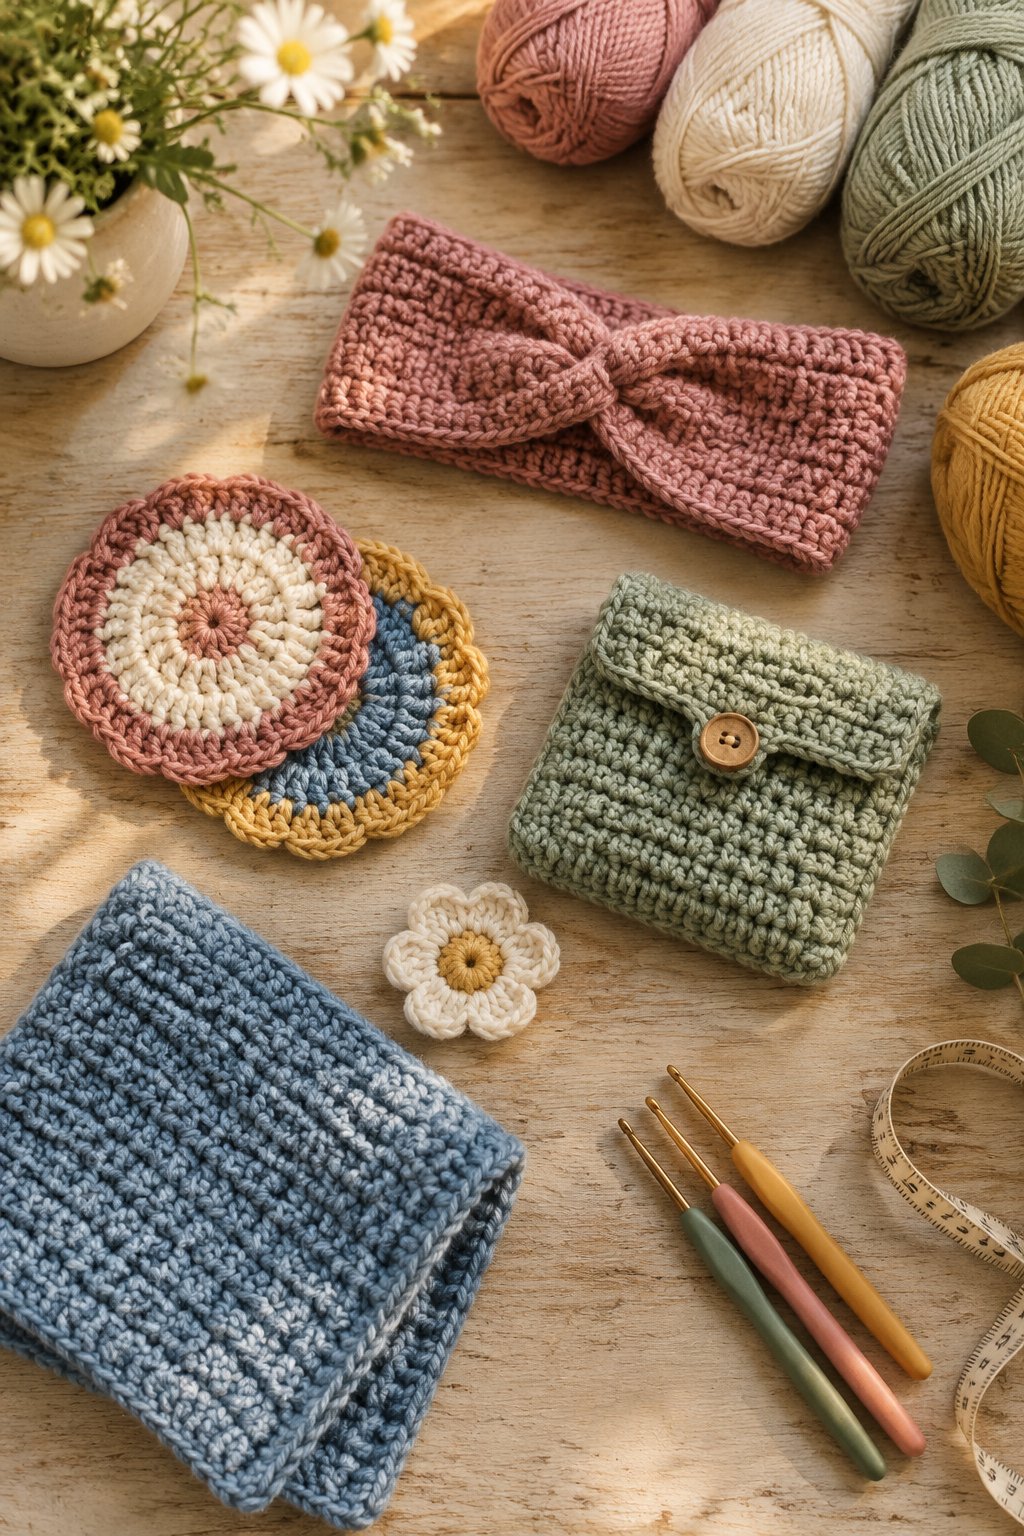
You’ll get the most satisfying results from light-colored yarn that makes your stitches easy to see. Treat the project times as planning estimates, with extra room for learning, and check your finished size as you work. A small handmade piece gives you space to practice without committing to weeks of stitching.
1) Textured Cotton Dishcloth

Your textured cotton dishcloth gives you a useful first project while you practice keeping straight edges. Choose warm cream or sage green for a soft kitchen accent, and aim for an 8-inch square.
Use worsted-weight cotton with a 5 mm hook as your starting point. For gentle texture, alternate single crochet and double crochet across an even number of stitches. On each following row, place single crochet into double crochet and double crochet into single crochet.
Check your width after several rows so you catch a shrinking edge early. Once your square reaches the right height, add a single crochet border with three stitches in each corner.
You’ll have a beginner-friendly gift to pair with handmade soap. Wash your finished cloth according to the yarn label before putting it into kitchen rotation.
|
Detail |
Specification |
|---|---|
|
Yarn Weight |
Worsted cotton, #4 |
|
Skill Level |
Beginner |
|
Estimated Time |
2–3 hours |
2) Square Crochet Coasters With Contrast Borders

A contrast border gives your square crochet coasters a crisp finish with very little extra stitching. Try a blush center with burgundy edging, or pair oatmeal cotton with a deep blue frame.
Start with worsted-weight cotton and a 4.5–5 mm hook. Work single crochet rows until you have a square about 4 inches across. Measure both directions before adding the border, since your stitch height and width will differ.
Join your accent color at a corner and crochet around all four sides. Place three single crochet stitches in each corner, then lay the coaster flat to check for rippling.
You’ll practice turning and changing colors on a beginner-sized piece. Make a matching pair for your desk, or bundle four with cotton ribbon for a practical housewarming gift that fits easily inside a card-sized box.
|
Detail |
Specification |
|---|---|
|
Yarn Weight |
Worsted cotton, #4 |
|
Skill Level |
Beginner |
|
Estimated Time |
45–90 minutes each |
3) Slim Crochet Bookmark With a Tassel

With a slim crochet bookmark, you get a delicate-looking gift from a small amount of yarn. Choose dusty lavender or pale blue, then add a matching tassel for a soft finish.
Use fine cotton yarn with a 2.5–3 mm hook to keep your bookmark thin. Chain to your desired length, around 6–7 inches, and work a few narrow rows of single crochet. Keep your starting chain relaxed so the strip lies straight.
For the tassel, fold several short yarn strands through one end and secure them with a wrapped tie. Trim the ends evenly, keeping the tassel outside the book when you use it.
This beginner project helps you practice consistent tension on a narrow shape. Slip your finished piece into a gift book, and check that every woven end feels smooth against the pages.
|
Detail |
Specification |
|---|---|
|
Yarn Weight |
Fine cotton, #2 |
|
Skill Level |
Beginner |
|
Estimated Time |
45–90 minutes |
4) Ruffled Crochet Scrunchie

Your ruffled crochet scrunchie gets its fluffy shape from extra stitches worked around a hair elastic. Pick peach or butter yellow for a cheerful accessory that shows off the folds.
Choose smooth DK yarn and a 4 mm hook. Begin by covering a sturdy, fabric-covered elastic with single crochet, sliding the stitches together as you work. Keep the elastic relaxed while checking that your stitches cover it evenly.
For the ruffle, work two or three double crochet stitches into each stitch around. More stitches create fuller waves, so check the shape before finishing the round. Secure the join and weave your yarn tails through several stitches.
You’ll practice crocheting around an object on this easy accessory. Match your yarn to a favorite outfit, and test the finished scrunchie’s stretch before giving it as a gift.
|
Detail |
Specification |
|---|---|
|
Yarn Weight |
DK, #3 |
|
Skill Level |
Easy |
|
Estimated Time |
1–2 hours |
5) Rectangle Crochet Bow Hair Clip

A small crochet rectangle becomes your bow hair clip with a pinched center and a few secure wraps. Try cherry red for a bold accent or muted pink for a softer everyday look.
Use DK cotton with a 3.5–4 mm hook. Work single crochet rows to create a rectangle about 4 inches wide and 2 inches tall. Leave a long yarn tail for shaping and fastening the center.
Pinch the middle into even folds, then wrap the tail firmly around it. Sew through those wraps to hold the shape before attaching the bow to a sew-on barrette or clip blank.
You’ll need only basic stitches and simple hand sewing for this beginner project. Keep your attachment stitches clear of the clip’s moving parts, and tug gently on both bow ends to check the fastening.
|
Detail |
Specification |
|---|---|
|
Yarn Weight |
DK cotton, #3 |
|
Skill Level |
Beginner |
|
Estimated Time |
45–90 minutes |
6) Button-Closure Mug Cozy

Your button-closure mug cozy adds a soft band of color while leaving the handle accessible. Choose rust yarn with a wooden button for a warm look, and keep the upper edge below the drinking rim.
Start with worsted-weight cotton and a 4.5–5 mm hook. Work a rectangle in half double crochet, measuring it around your mug as you go. Leave a small gap beside the handle so the closure has room.
Add a chain loop at one end and sew a button securely to the other. Test the loop against your button before fastening off, adjusting its length for a snug fit.
This beginner project gives you useful practice with custom sizing. Remove the cozy before washing the mug, and handle hot drinks carefully because crocheted fabric provides uneven protection from heat.
|
Detail |
Specification |
|---|---|
|
Yarn Weight |
Worsted cotton, #4 |
|
Skill Level |
Beginner |
|
Estimated Time |
1–2 hours |
7) Cotton Soap Saver Drawstring Pouch

A cotton soap saver pouch lets you gather small soap pieces inside a reusable drawstring bag. Try seafoam green or natural cotton for a simple bathroom accessory with a lightly textured surface.
Choose DK cotton and a 4 mm hook. Crochet a single crochet rectangle that folds around your soap with a little extra room. Fold it in half and seam the sides, leaving the top open.
Add a round of evenly spaced chain-one openings along the rim. Thread a crocheted chain through those openings, then knot its ends together so your drawstring stays in place.
You’ll practice seaming and a basic eyelet edge on this easy project. Check the pouch against your soap before closing the side seams. After use, rinse it thoroughly and hang it where air circulates so the cotton dries between washes.
|
Detail |
Specification |
|---|---|
|
Yarn Weight |
DK cotton, #3 |
|
Skill Level |
Easy |
|
Estimated Time |
1–2 hours |
8) Five-Petal Crochet Flower Appliqué

Your five-petal crochet flower adds a bright accent to a pouch or headband with just a few yards of yarn. Pair a golden center with cream petals for a daisy-inspired finish.
Use DK cotton with a 3.5 mm hook. For a compact version, make a chain ring and work 10 single crochet stitches into its center. Join the round, then change to your petal color.
Shape each petal across two base stitches: work a slip stitch and half double crochet in the first, then three double crochet stitches, half double crochet, and a slip stitch in the next. Repeat around for five petals.
This easy project introduces working several stitches into one spot. Leave a generous sewing tail, then attach your flower through its center and petal bases so the edges stay secure during use.
|
Detail |
Specification |
|---|---|
|
Yarn Weight |
DK cotton, #3 |
|
Skill Level |
Easy |
|
Estimated Time |
30–60 minutes |
9) Twisted Crochet Ear Warmer

A folded seam gives your crochet ear warmer its distinctive twist without complicated shaping. Choose heather gray or plum to highlight the ribs across a band about 4 inches wide.
Use soft worsted-weight yarn with a 5–5.5 mm hook. Work half double crochet through the back loop, turning after each row. Make the rectangle long enough to fit snugly around your head with gentle stretch.
To form the twist, fold both short ends in half. Interlock the folded ends so their four layers alternate, then sew through all four layers. Turn the seam inward to reveal the center detail.
You’ll use beginner stitches with an easy finishing step. Check your fit before sewing permanently, and keep the seam firm enough to hold while allowing the band to stretch comfortably over your ears and hair.
|
Detail |
Specification |
|---|---|
|
Yarn Weight |
Worsted, #4 |
|
Skill Level |
Easy |
|
Estimated Time |
2–4 hours |
10) Mini Granny Square Keychain

Your mini granny square keychain turns a classic crochet motif into a colorful everyday accessory. Try pink and orange around a cream center, keeping your finished square about 2–3 inches across.
Use DK cotton and a 3.5 mm hook for a compact fabric. Work a two-round granny square with three-double-crochet clusters and chain spaces. Mark your corner spaces so you keep all four corners in position.
For a sturdier keychain, make two matching squares and join them around the edges with single crochet. Add a short reinforced loop at one corner and thread it through a metal split ring.
This easy project suits you once double crochet feels comfortable. Weave in each color tail before joining the squares, and check the hanging loop closely because that small section carries the pull from your keys.
|
Detail |
Specification |
|---|---|
|
Yarn Weight |
DK cotton, #3 |
|
Skill Level |
Easy |
|
Estimated Time |
1–2 hours |
11) Chunky Crochet Catchall Basket

A chunky catchall basket gives you a small storage project with satisfying, sturdy sides. Choose oatmeal or charcoal yarn for a rounded container that holds your stitch markers or hair accessories.
Use bulky cotton cord or firm bulky yarn with a 6–7 mm hook. Aim for dense stitches that hold their shape. Begin with six single crochet stitches in a ring, then increase evenly until your base reaches about 4 inches across.
Work one round through the back loops to define the bottom edge. Continue with one single crochet in each stitch until your sides reach the height you want.
You’ll need comfortable round-counting for this easy project. Use a marker in the first stitch of every round, and keep the basket shallow for your first attempt so its walls stay upright during everyday use.
|
Detail |
Specification |
|---|---|
|
Yarn Weight |
Bulky, #5 |
|
Skill Level |
Easy |
|
Estimated Time |
2–3 hours |
12) Striped Crochet Phone Sleeve

Your striped crochet phone sleeve adds a soft layer around your phone and gives you room to experiment with color. Pair navy with cream for clean stripes, or use two shades of green.
Choose DK cotton and a 3.5–4 mm hook. Crochet a single crochet rectangle slightly wider than your phone in its everyday case. Make the rectangle long enough to fold over the phone from bottom to top.
Change colors every two or four rows, then fold and seam the sides. Check the fit before securing your seams, leaving enough room to slide the phone in easily.
This beginner project combines straight rows with simple construction. Keep yarn tails away from the opening, where they might catch. Use your sleeve as a soft pouch; rely on a protective phone case for impact protection during drops.
|
Detail |
Specification |
|---|---|
|
Yarn Weight |
DK cotton, #3 |
|
Skill Level |
Beginner |
|
Estimated Time |
2–3 hours |
13) Mini Granny Triangle Bunting

Mini granny triangle bunting gives you a cheerful decoration built from repeatable little motifs. Choose coral and cream with touches of mustard, then arrange your triangles in a repeating color order.
Use DK cotton with a 4 mm hook for defined clusters. Start each triangle with three groups of three double crochet stitches in a center ring, separated by corner chain spaces. Build outward with clusters and increases at those three corners.
Make three to five small triangles for your first strand. Block them to matching sizes, then crochet a joining chain across their top edges with equal gaps between motifs.
You’ll practice granny clusters and corner placement on this easy project. Hang your finished strand above a craft shelf or across a wall, keeping its cord securely fastened and out of reach of young children.
|
Detail |
Specification |
|---|---|
|
Yarn Weight |
DK cotton, #3 |
|
Skill Level |
Easy |
|
Estimated Time |
3–5 hours per strand |
14) Granny Stitch Tie-Back Bandana

Your granny stitch bandana creates an airy triangular accessory with adjustable ties at the back. Choose soft yellow for a sunny finish, or use narrow pastel stripes to emphasize the growing rows.
Work with sport-weight cotton and a 3.5–4 mm hook. Use a row-based granny triangle pattern with clearly marked edge increases. Your repeated three-double-crochet clusters create open spaces while the triangle expands from its starting point.
Measure the long edge against your head as you work. Add chains at both top corners for ties, then slip stitch back along them for a firmer finish.
This easy project suits you after a small granny motif. Try it on before cutting your yarn so you have room to adjust the ties. Keep both ties equal in length, and secure color-change ends along the denser cluster stitches.
|
Detail |
Specification |
|---|---|
|
Yarn Weight |
Sport cotton, #2 |
|
Skill Level |
Easy |
|
Estimated Time |
3–5 hours |
15) Ribbed Rectangle Fingerless Mitts

Two ribbed rectangles become your fingerless mitts when you seam them with openings for your thumbs. Try moss green or deep berry yarn for cozy accessories with a clean, fitted shape.
Use soft worsted-weight yarn with a 5 mm hook. Chain to the length you want from wrist to knuckles, then work back-loop single crochet rows. Continue until the rectangle wraps around your hand with comfortable stretch.
Fold each rectangle and seam its long edges, leaving a thumb gap about 1.5–2 inches long. Try on the first mitt before completing the seam, adjusting the gap to your hand.
You’ll use beginner stitches and basic sewing for this pair. Count your rows carefully so both mitts match. Leave the finger edge loose enough for easy movement when you type, crochet, or hold a warm mug.
|
Detail |
Specification |
|---|---|
|
Yarn Weight |
Worsted, #4 |
|
Skill Level |
Beginner |
|
Estimated Time |
3–5 hours per pair |
16) Mini Ribbed Crochet Pumpkin

Your mini ribbed crochet pumpkin gets its rounded shape from a gathered rectangle and a little stuffing. Choose burnt orange for a classic fall accent, or make a cream version for a neutral shelf.
Use worsted-weight yarn with a 4.5 mm hook. Work back-loop single crochet into a rectangle roughly twice as wide as it is tall. Join the short ends to form a tube with the ribs running vertically.
Gather the bottom edge tightly, add small amounts of fiberfill, and gather the top. Shape shallow grooves with long yarn strands drawn through the center, then sew on a short crocheted stem.
This easy project introduces soft shaping without complex increases. Keep the stuffing light enough to let you cinch the center. Use your finished pumpkin as indoor decor, with the stem attached firmly through several stitches.
|
Detail |
Specification |
|---|---|
|
Yarn Weight |
Worsted, #4 |
|
Skill Level |
Easy |
|
Estimated Time |
1.5–3 hours |
17) Palm-Size Amigurumi Whale
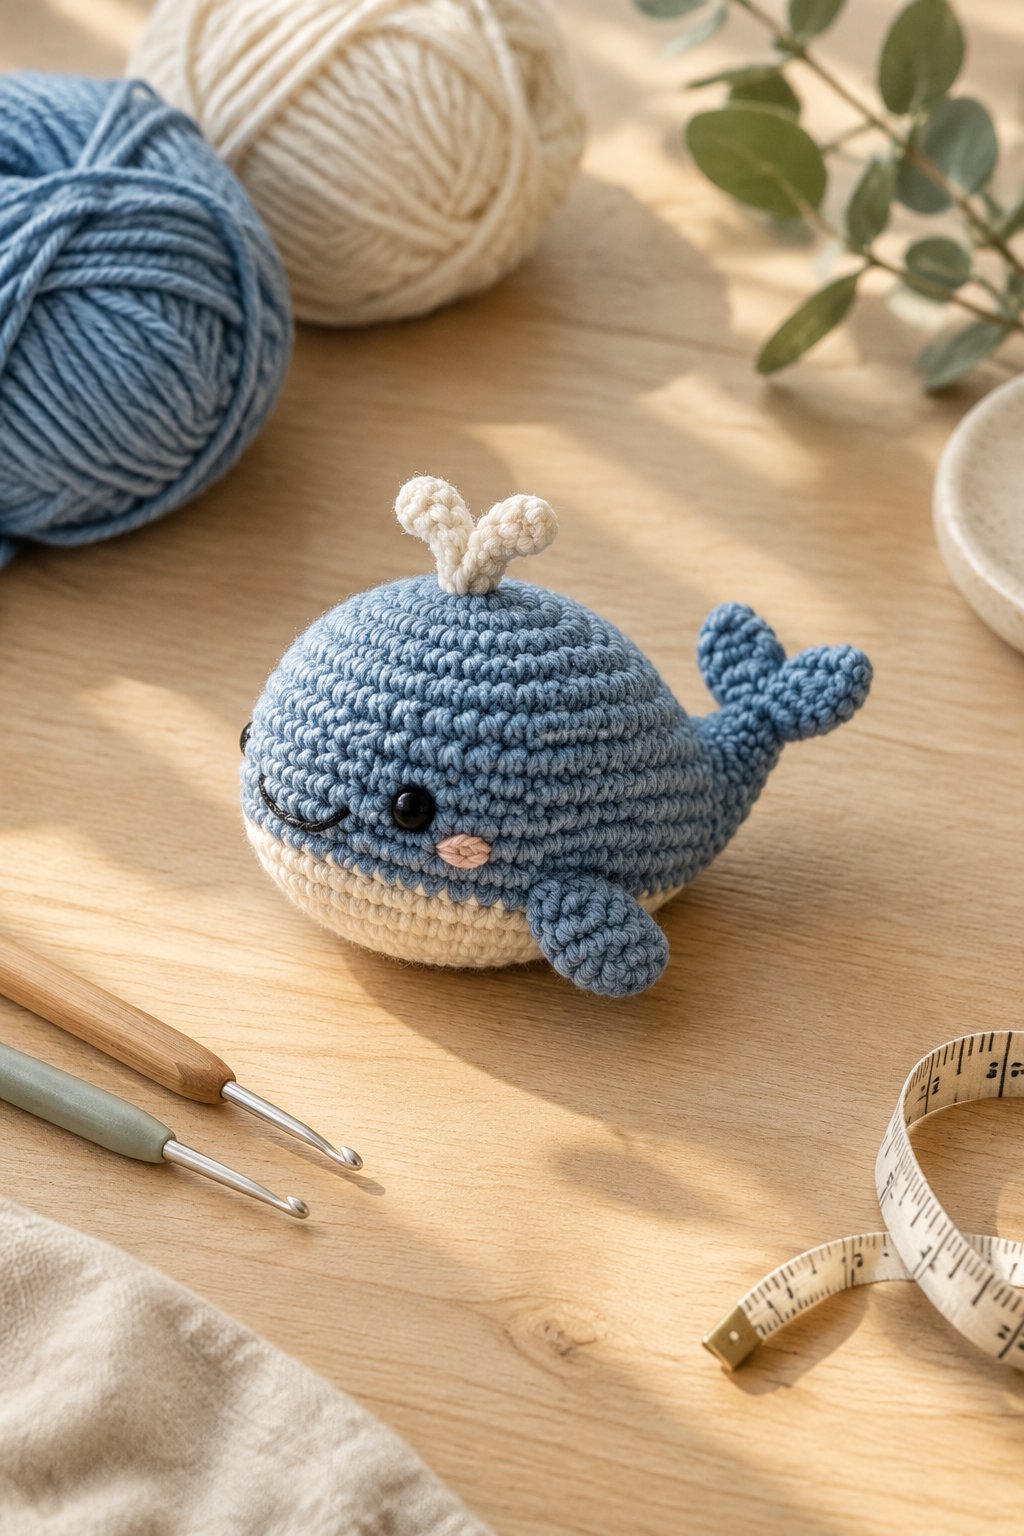
A palm-size amigurumi whale gives you a gentle introduction to stuffed crochet shapes once you’re comfortable counting rounds. Choose sky blue or lilac for a rounded body with tiny fins and an embroidered smile.
Use smooth worsted-weight yarn with a 3.5–4 mm hook to make close-fitting stitches. Choose a beginner whale pattern with single crochet increases and decreases. Smooth yarn helps you see each stitch while you learn the shaping.
Mark the first stitch of every round and count before moving on. Add fiberfill in small pieces, checking that your fabric keeps the stuffing contained. Sew each fin securely through several body stitches.
Treat this as an easy next-step project after your flat makes. Embroider the eyes for a baby gift, and check every seam and attachment carefully before giving the whale to a young child.
|
Detail |
Specification |
|---|---|
|
Yarn Weight |
Worsted, #4 |
|
Skill Level |
Easy |
|
Estimated Time |
3–5 hours |
How to Choose Your First Quick Crochet Project
Choose your first project by the construction skills you already know, then add one new technique. A small project with a clear finish line gives you room to learn without juggling several unfamiliar steps.
Which Projects Use Only Basic Stitches?
Your simplest options are the bookmark, bow, and phone sleeve because each begins as a plain rectangle. You’ll use chains and single crochet, followed by a small amount of finishing.
For a first attempt, choose the bow if you want fewer rows or the dishcloth if you want more stitch practice. Read through the finishing instructions before starting so you have any needed sewing needle or hardware nearby.
Should You Start With Rows or Rounds?
Start with rows when you’re still learning where to place your hook. A straight piece lets you see both edges clearly and compare each row with the one below it.
Move to rounds once you’re comfortable identifying individual stitches. For your first round-based project, use a locking stitch marker and move it at the start of every round. Count before continuing, especially on a basket base or stuffed shape where increases change the stitch total.
How Much Time Should a First Project Take?
Set aside one or two relaxed sessions for your first small project. A coaster or bookmark gives you a manageable goal, though learning the starting chain alone deserves some unhurried practice.
Use the listed times as rough estimates, including basic finishing. Color changes and reworking uneven rows will lengthen your session. If you have a gift deadline, finish one sample before planning a matching set.
Yarn, Hooks, and Finishing Basics
Pair smooth, light-colored yarn with a comfortable hook and finish each piece as carefully as you crochet it. These choices help you see mistakes early and give your handmade item a tidy, usable result.
When Should You Choose Cotton, Worsted, or Chunky Yarn?
Choose cotton for absorbent projects such as dishcloths and soap savers. For accessories, select a fiber that feels comfortable against your skin and has care instructions you’re happy to follow.
Remember that cotton describes the fiber, while worsted and chunky describe yarn thickness. Cotton comes in several weights. Start with smooth worsted yarn for clear stitch definition, and choose chunky yarn when you want a larger, thicker piece. Save fuzzy chenille for after you’re comfortable finding and counting stitches.
How Do You Match Your Hook to Your Yarn?
Use the yarn label’s recommended hook size as your starting point, then check the fabric your project needs. The hook suggestions above are starting ranges, so your own tension will influence the result.
Make a small swatch before beginning a fitted item. If the fabric feels too stiff, try a larger hook; if your basket or stuffed piece has visible gaps, try a smaller one. Measure wearable projects against your hand or head as you work, including any stretch.
How Can You Keep Edges, Seams, and Ends Neat?
Count your stitches after every row while you’re learning, and mark the first and last stitches if the edges are hard to spot. Follow your pattern’s rule for turning chains, since some count as a stitch and others serve only to gain height.
Leave yarn tails about 6 inches long for weaving. Thread each tail through several stitches, change direction, and check that it stays hidden when you gently stretch the fabric. Align seams stitch by stitch, then wash or block the finished piece according to the yarn label before trimming any remaining tails.